> ## Documentation Index
> Fetch the complete documentation index at: https://bun.ll1025.cn/llms.txt
> Use this file to discover all available pages before exploring further.
# 在 AWS Lambda 上部署 Bun 应用
[AWS Lambda](https://aws.amazon.com/lambda/) 是一种无服务器计算服务,让你无需预置或管理服务器即可运行代码。
本指南使用 `Dockerfile` 将一个 Bun HTTP 服务器部署到 AWS Lambda。
在继续之前,请确保你已准备:
* 一个可供部署的 Bun 应用
* 一个 [AWS 账户](https://aws.amazon.com/)
* 已安装并配置好 [AWS CLI](https://docs.aws.amazon.com/cli/latest/userguide/cli-chap-getting-started.html)
* 已安装 [Docker](https://docs.docker.com/get-started/get-docker/) 并将其添加到你的 `PATH` 中
***
在项目的根目录下创建一个新的 `Dockerfile`。该文件包含初始化容器、将本地项目文件复制到其中、安装依赖和启动应用程序的指令。
```docker Dockerfile icon="docker" theme={null}
# 使用官方 AWS Lambda 适配器镜像来处理 Lambda 运行时
FROM public.ecr.aws/awsguru/aws-lambda-adapter:0.9.0 AS aws-lambda-adapter
# 使用官方 Bun 镜像来运行应用程序
FROM oven/bun:debian AS bun_latest
# 将 Lambda 适配器复制到容器中
COPY --from=aws-lambda-adapter /lambda-adapter /opt/extensions/lambda-adapter
# 设置端口为 8080。这是 AWS Lambda 适配器所必需的。
ENV PORT=8080
# 设置工作目录为 `/var/task`。这是 Lambda 的默认工作目录。
WORKDIR "/var/task"
# 将 package.json 和 bun.lock 复制到容器中
COPY package.json bun.lock ./
# 安装依赖
RUN bun install --production --frozen-lockfile
# 将应用程序的其余部分复制到容器中
COPY . /var/task
# 运行应用程序。
CMD ["bun", "index.ts"]
```
确保启动命令与你的应用程序入口点对应。如果你的 `package.json` 中有 start 脚本,也可以是 `CMD ["bun", "run", "start"]`。
如果你的应用没有依赖项,可以省略 `RUN bun install --production --frozen-lockfile` 这一行。
在项目的根目录下创建一个新的 `.dockerignore` 文件。它列出了要从容器镜像中\_排除\_的文件和目录,例如 `node_modules`,这有助于使构建更快、更小:
```docker .dockerignore icon="Docker" theme={null}
node_modules
Dockerfile*
.dockerignore
.git
.gitignore
README.md
LICENSE
.vscode
.env
# 任何其他你想要排除的文件或目录
```
确保你在包含 `Dockerfile` 的目录中,然后构建 Docker 镜像。本示例将镜像命名为 `bun-lambda-demo` 并标记为 `latest`。
```bash terminal icon="terminal" theme={null}
# cd /path/to/your/app
docker build --provenance=false --platform linux/amd64 -t bun-lambda-demo:latest .
```
在推送镜像之前,创建一个 [ECR 仓库](https://aws.amazon.com/ecr/) 用于推送。
以下命令:
* 在 `us-east-1` 区域创建一个名为 `bun-lambda-demo` 的 ECR 仓库
* 将仓库 URI 导出为环境变量。这是可选的,但可以使后续步骤更容易。
```bash terminal icon="terminal" theme={null}
export ECR_URI=$(aws ecr create-repository --repository-name bun-lambda-demo --region us-east-1 --query 'repository.repositoryUri' --output text)
echo $ECR_URI
```
```txt theme={null}
[id].dkr.ecr.us-east-1.amazonaws.com/bun-lambda-demo
```
如果你使用 IAM Identity Center (SSO) 或已配置带有 profile 的 AWS CLI,请在 AWS CLI 命令中添加 `--profile` 标志。
例如,如果你的 profile 名为 `my-sso-app`,请使用 `--profile my-sso-app`。运行 `aws configure list-profiles` 查看你可用的 profiles。
```bash terminal icon="terminal" theme={null}
export ECR_URI=$(aws ecr create-repository --repository-name bun-lambda-demo --region us-east-1 --profile my-sso-app --query 'repository.repositoryUri' --output text)
echo $ECR_URI
```
登录到 ECR 仓库:
```bash terminal icon="terminal" theme={null}
aws ecr get-login-password --region us-east-1 | docker login --username AWS --password-stdin $ECR_URI
```
```txt theme={null}
Login Succeeded
```
如果使用 profile,请使用 `--profile` 标志:
```bash terminal icon="terminal" theme={null}
aws ecr get-login-password --region us-east-1 --profile my-sso-app | docker login --username AWS --password-stdin $ECR_URI
```
确保你在包含 `Dockerfile` 的目录中,然后将 Docker 镜像标记上 ECR 仓库 URI。
```bash terminal icon="terminal" theme={null}
docker tag bun-lambda-demo:latest ${ECR_URI}:latest
```
然后,将镜像推送到 ECR 仓库。
```bash terminal icon="terminal" theme={null}
docker push ${ECR_URI}:latest
```
前往 **AWS 控制台** > **Lambda** > [**创建函数**](https://us-east-1.console.aws.amazon.com/lambda/home?region=us-east-1#/create/function?intent=authorFromImage) > 选择 **容器镜像**
确保你选择了正确的区域。此 URL 默认为 `us-east-1`。
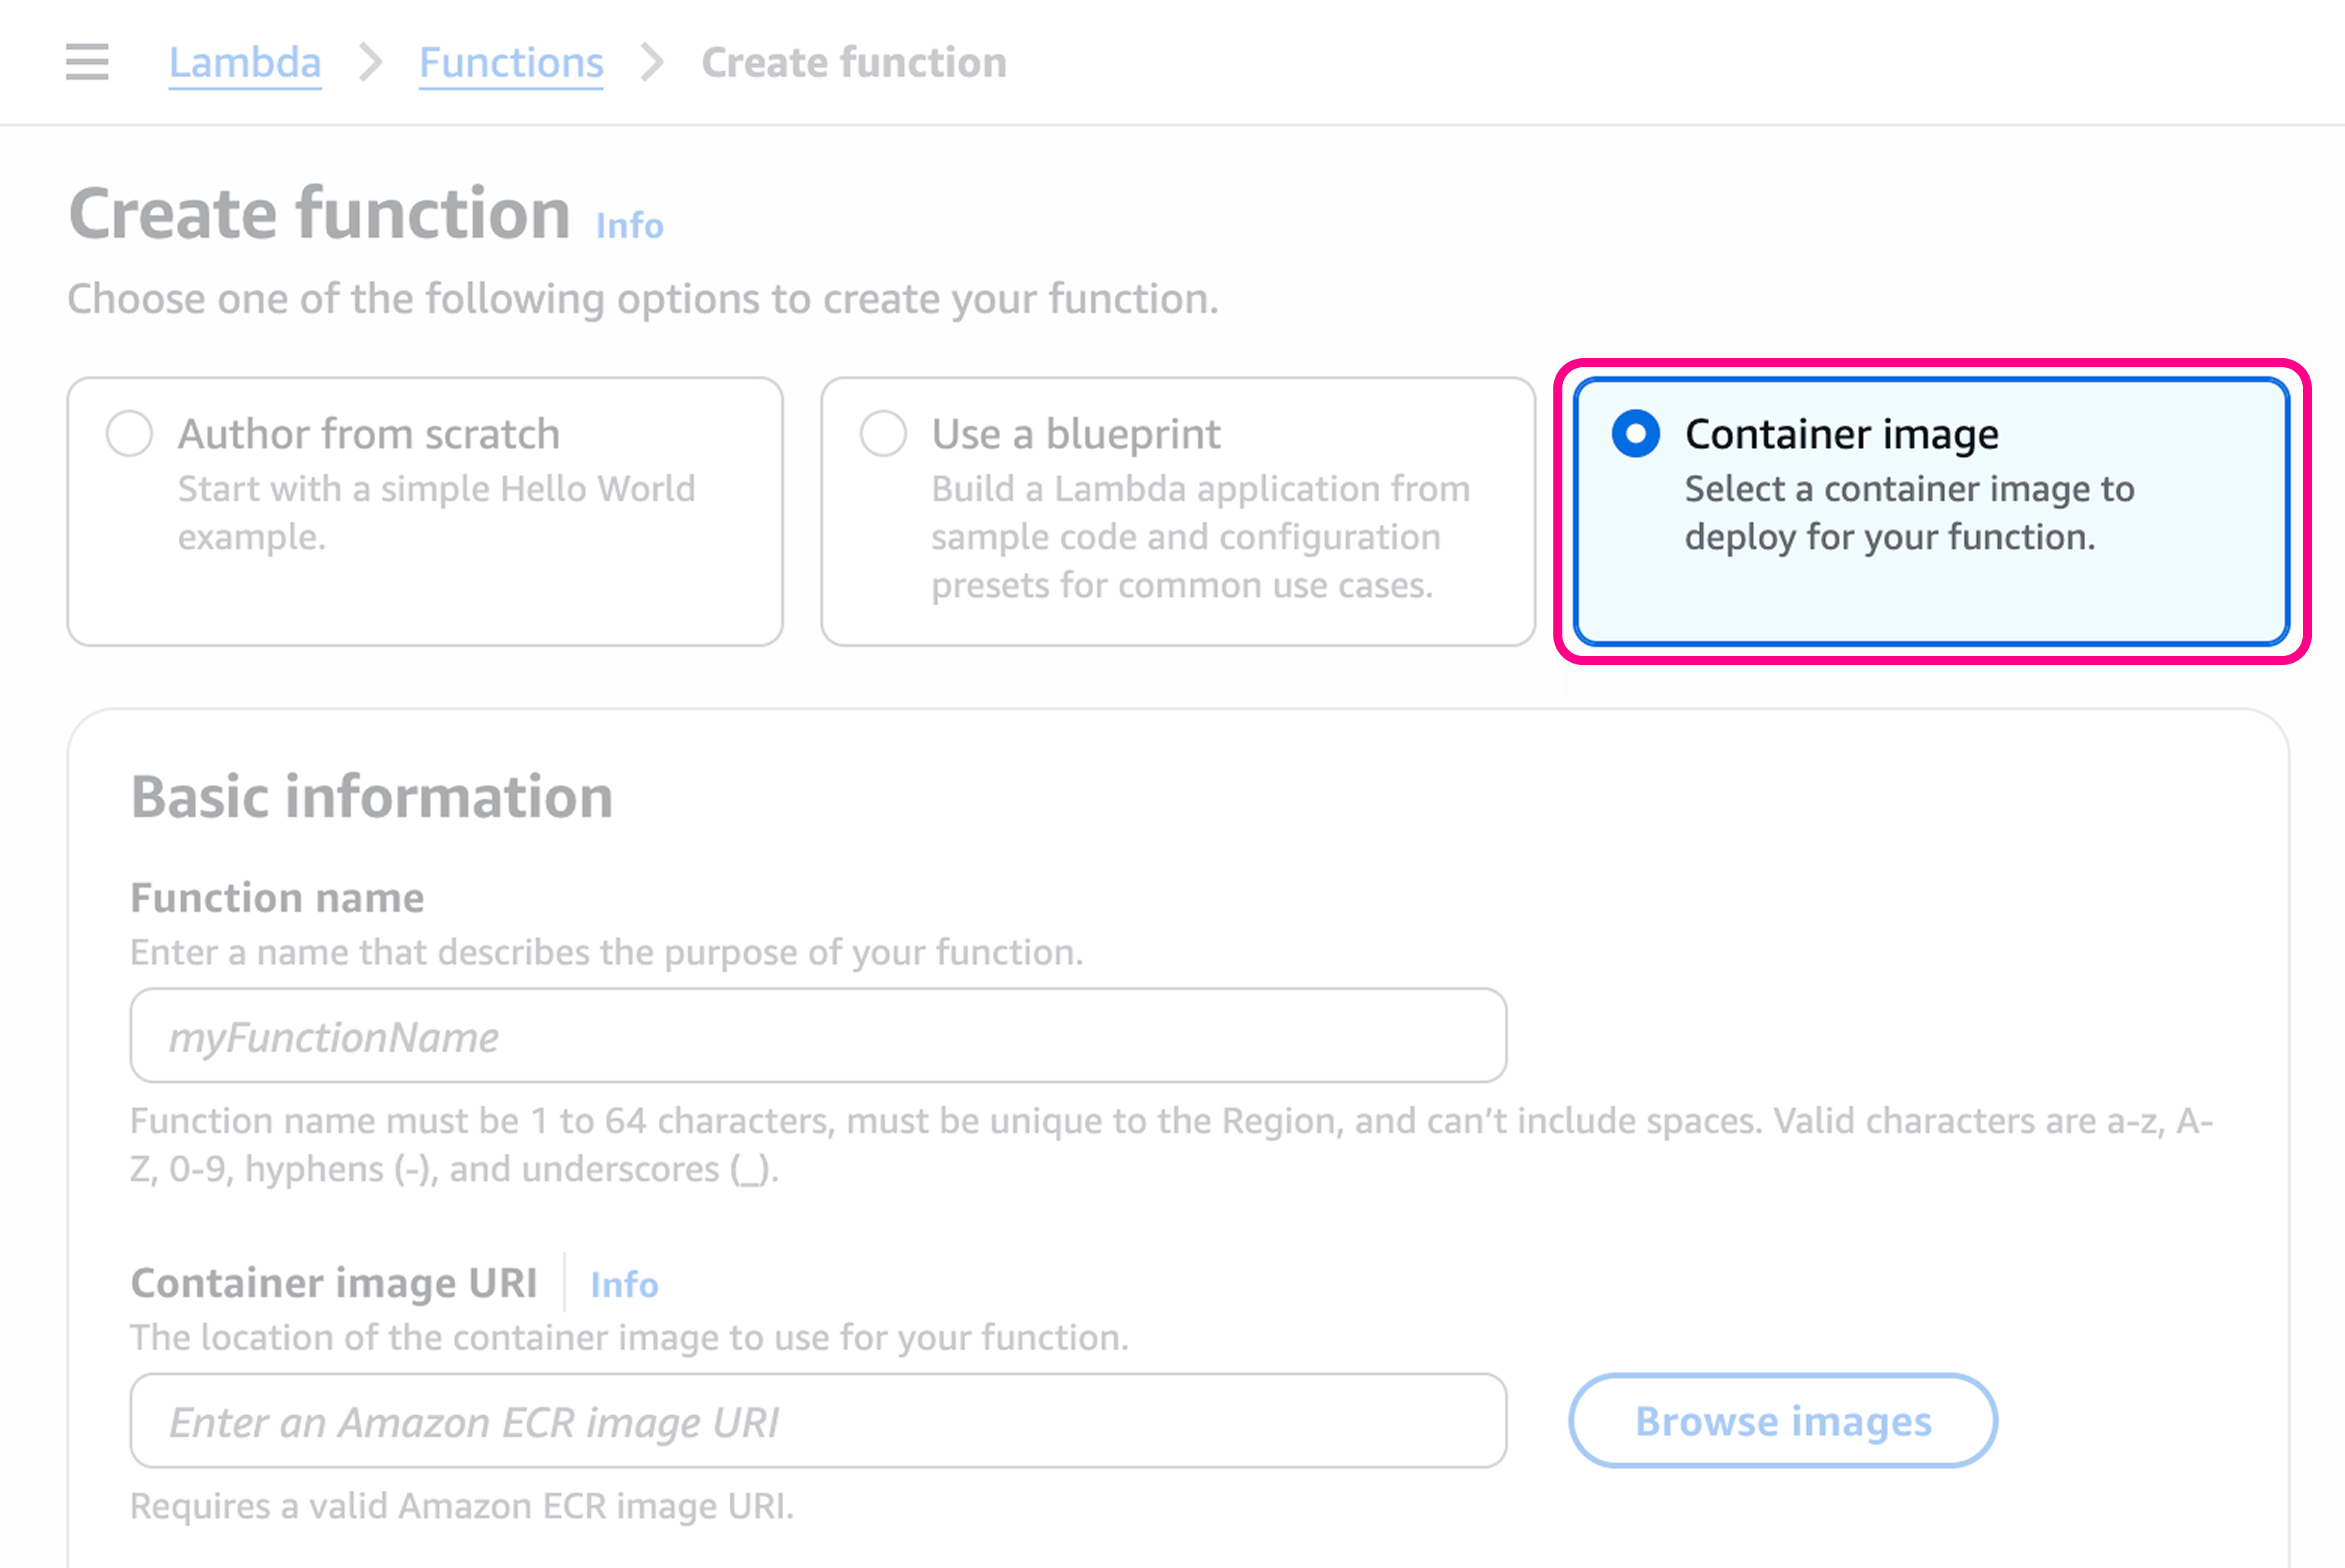 给函数起一个名称,例如 `my-bun-function`。
前往 **容器镜像 URI** 部分,点击 **浏览镜像**。选择你推送到 ECR 仓库的镜像。
给函数起一个名称,例如 `my-bun-function`。
前往 **容器镜像 URI** 部分,点击 **浏览镜像**。选择你推送到 ECR 仓库的镜像。
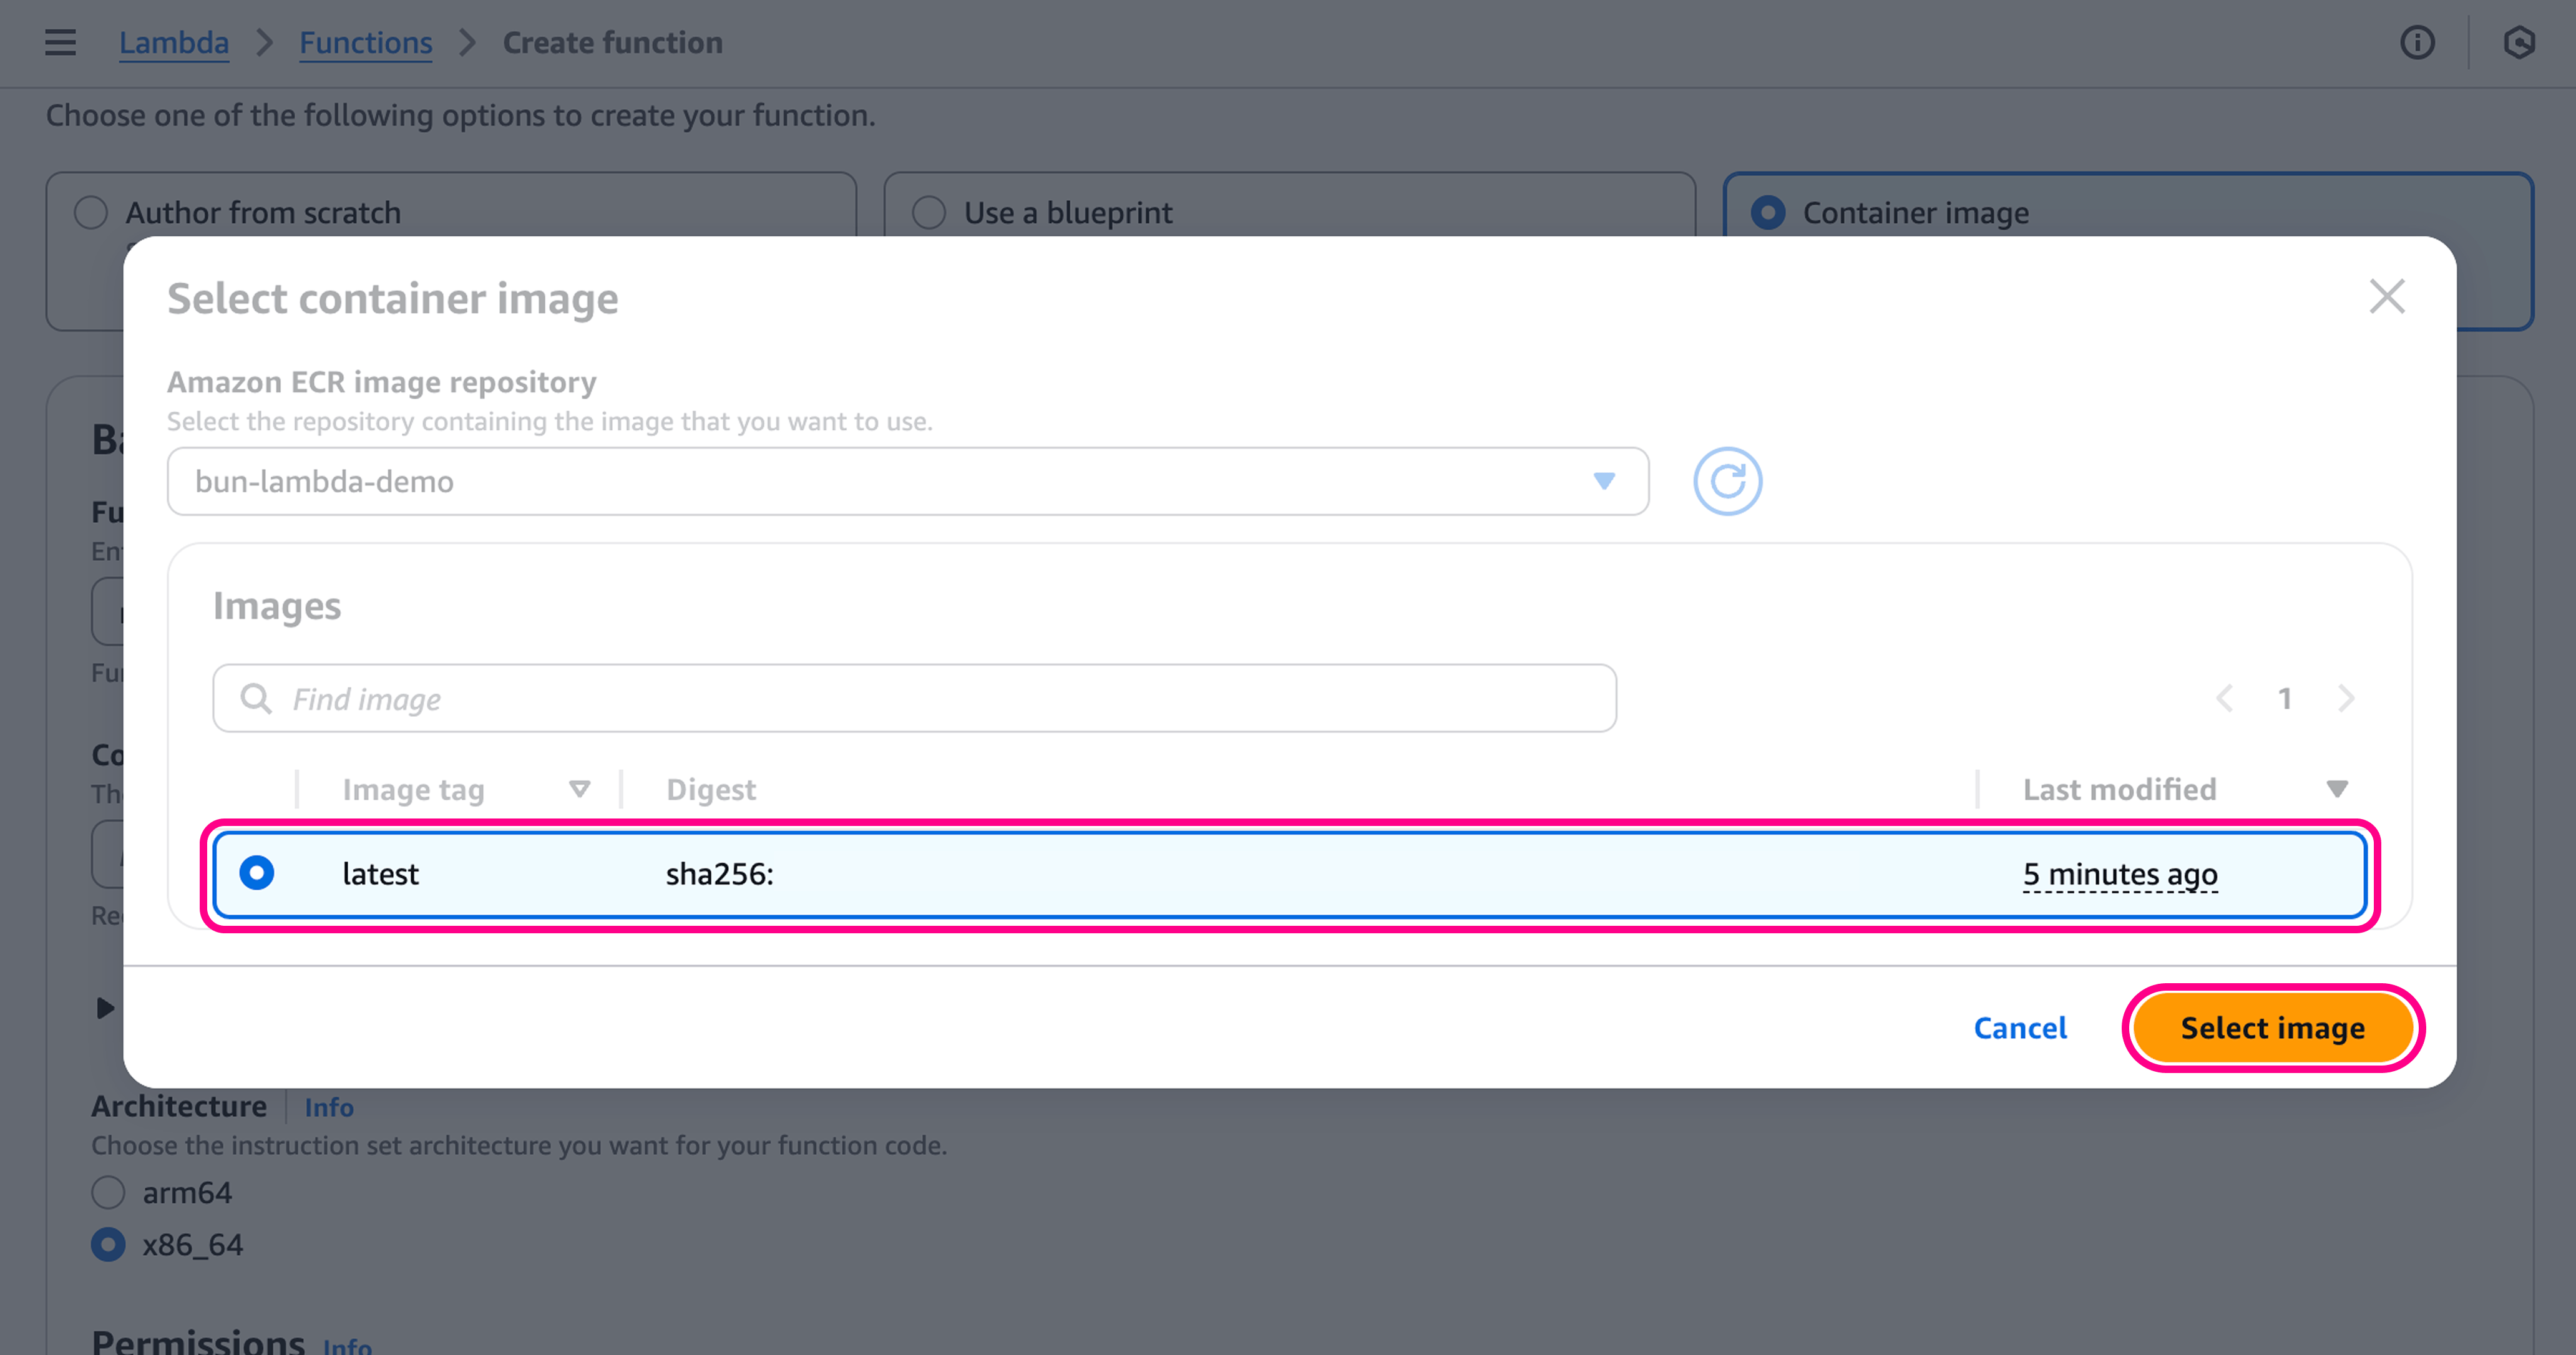
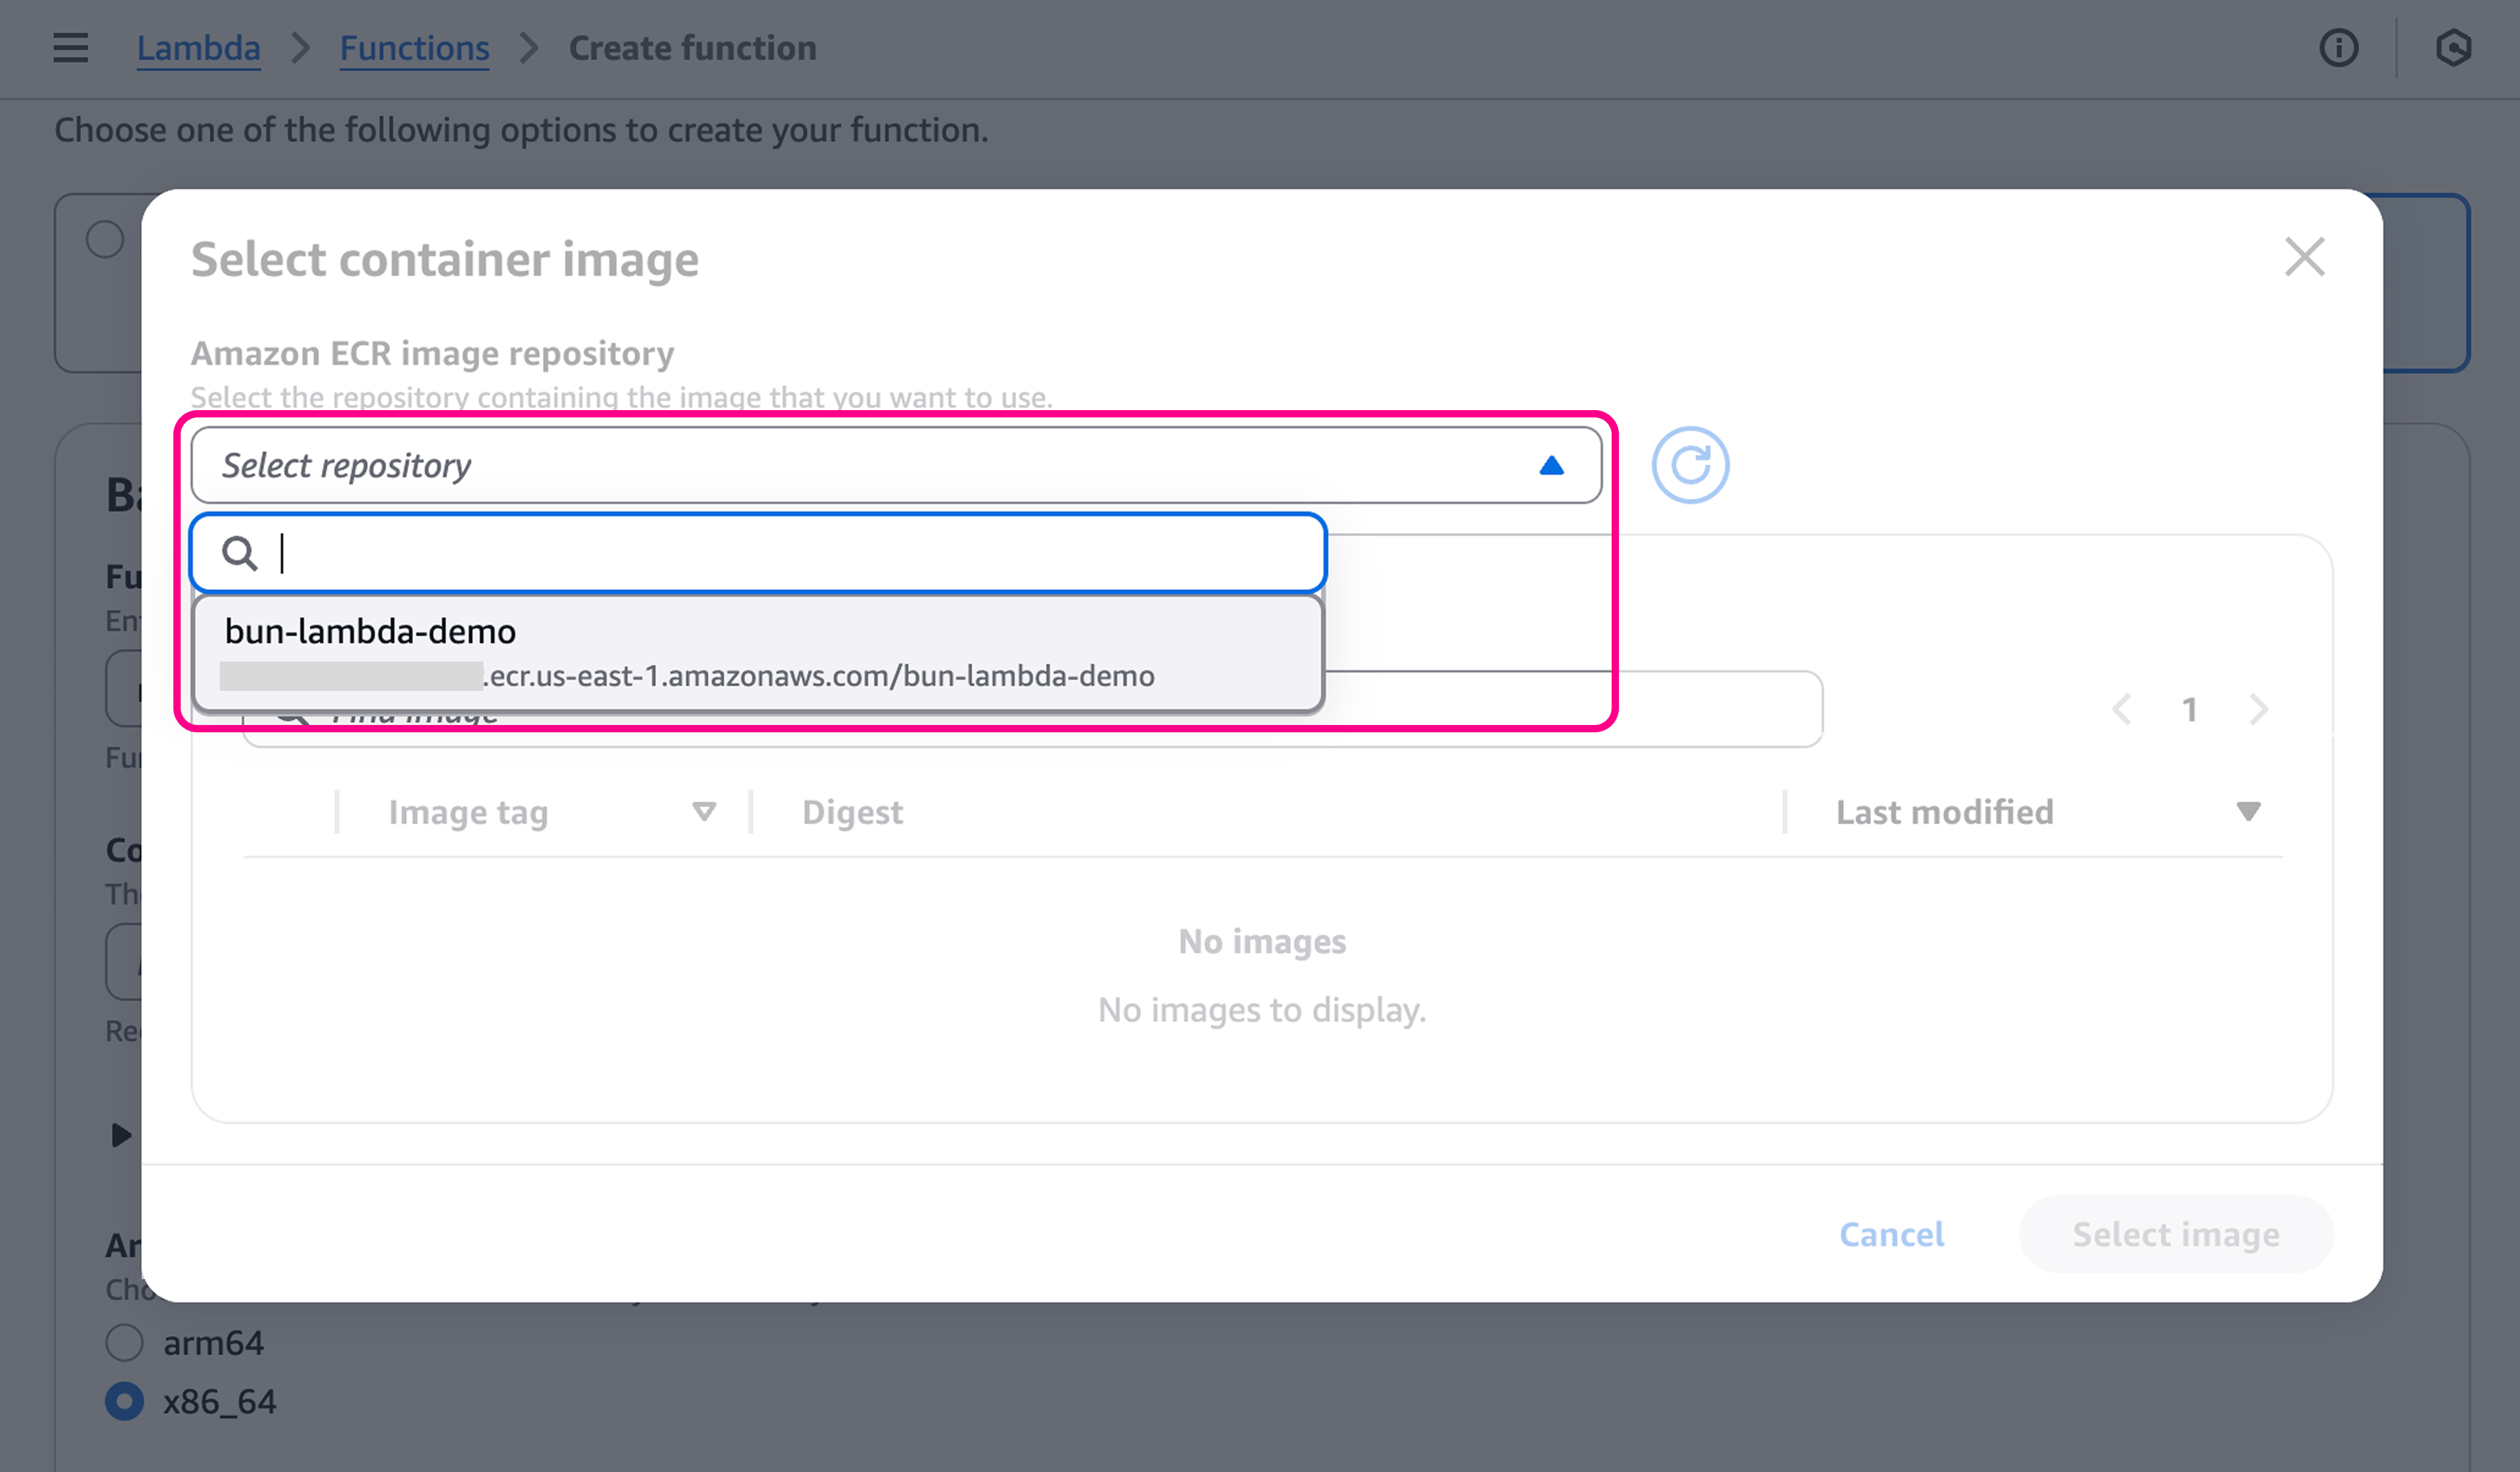 然后,选择 `latest` 镜像并点击 **选择镜像**。
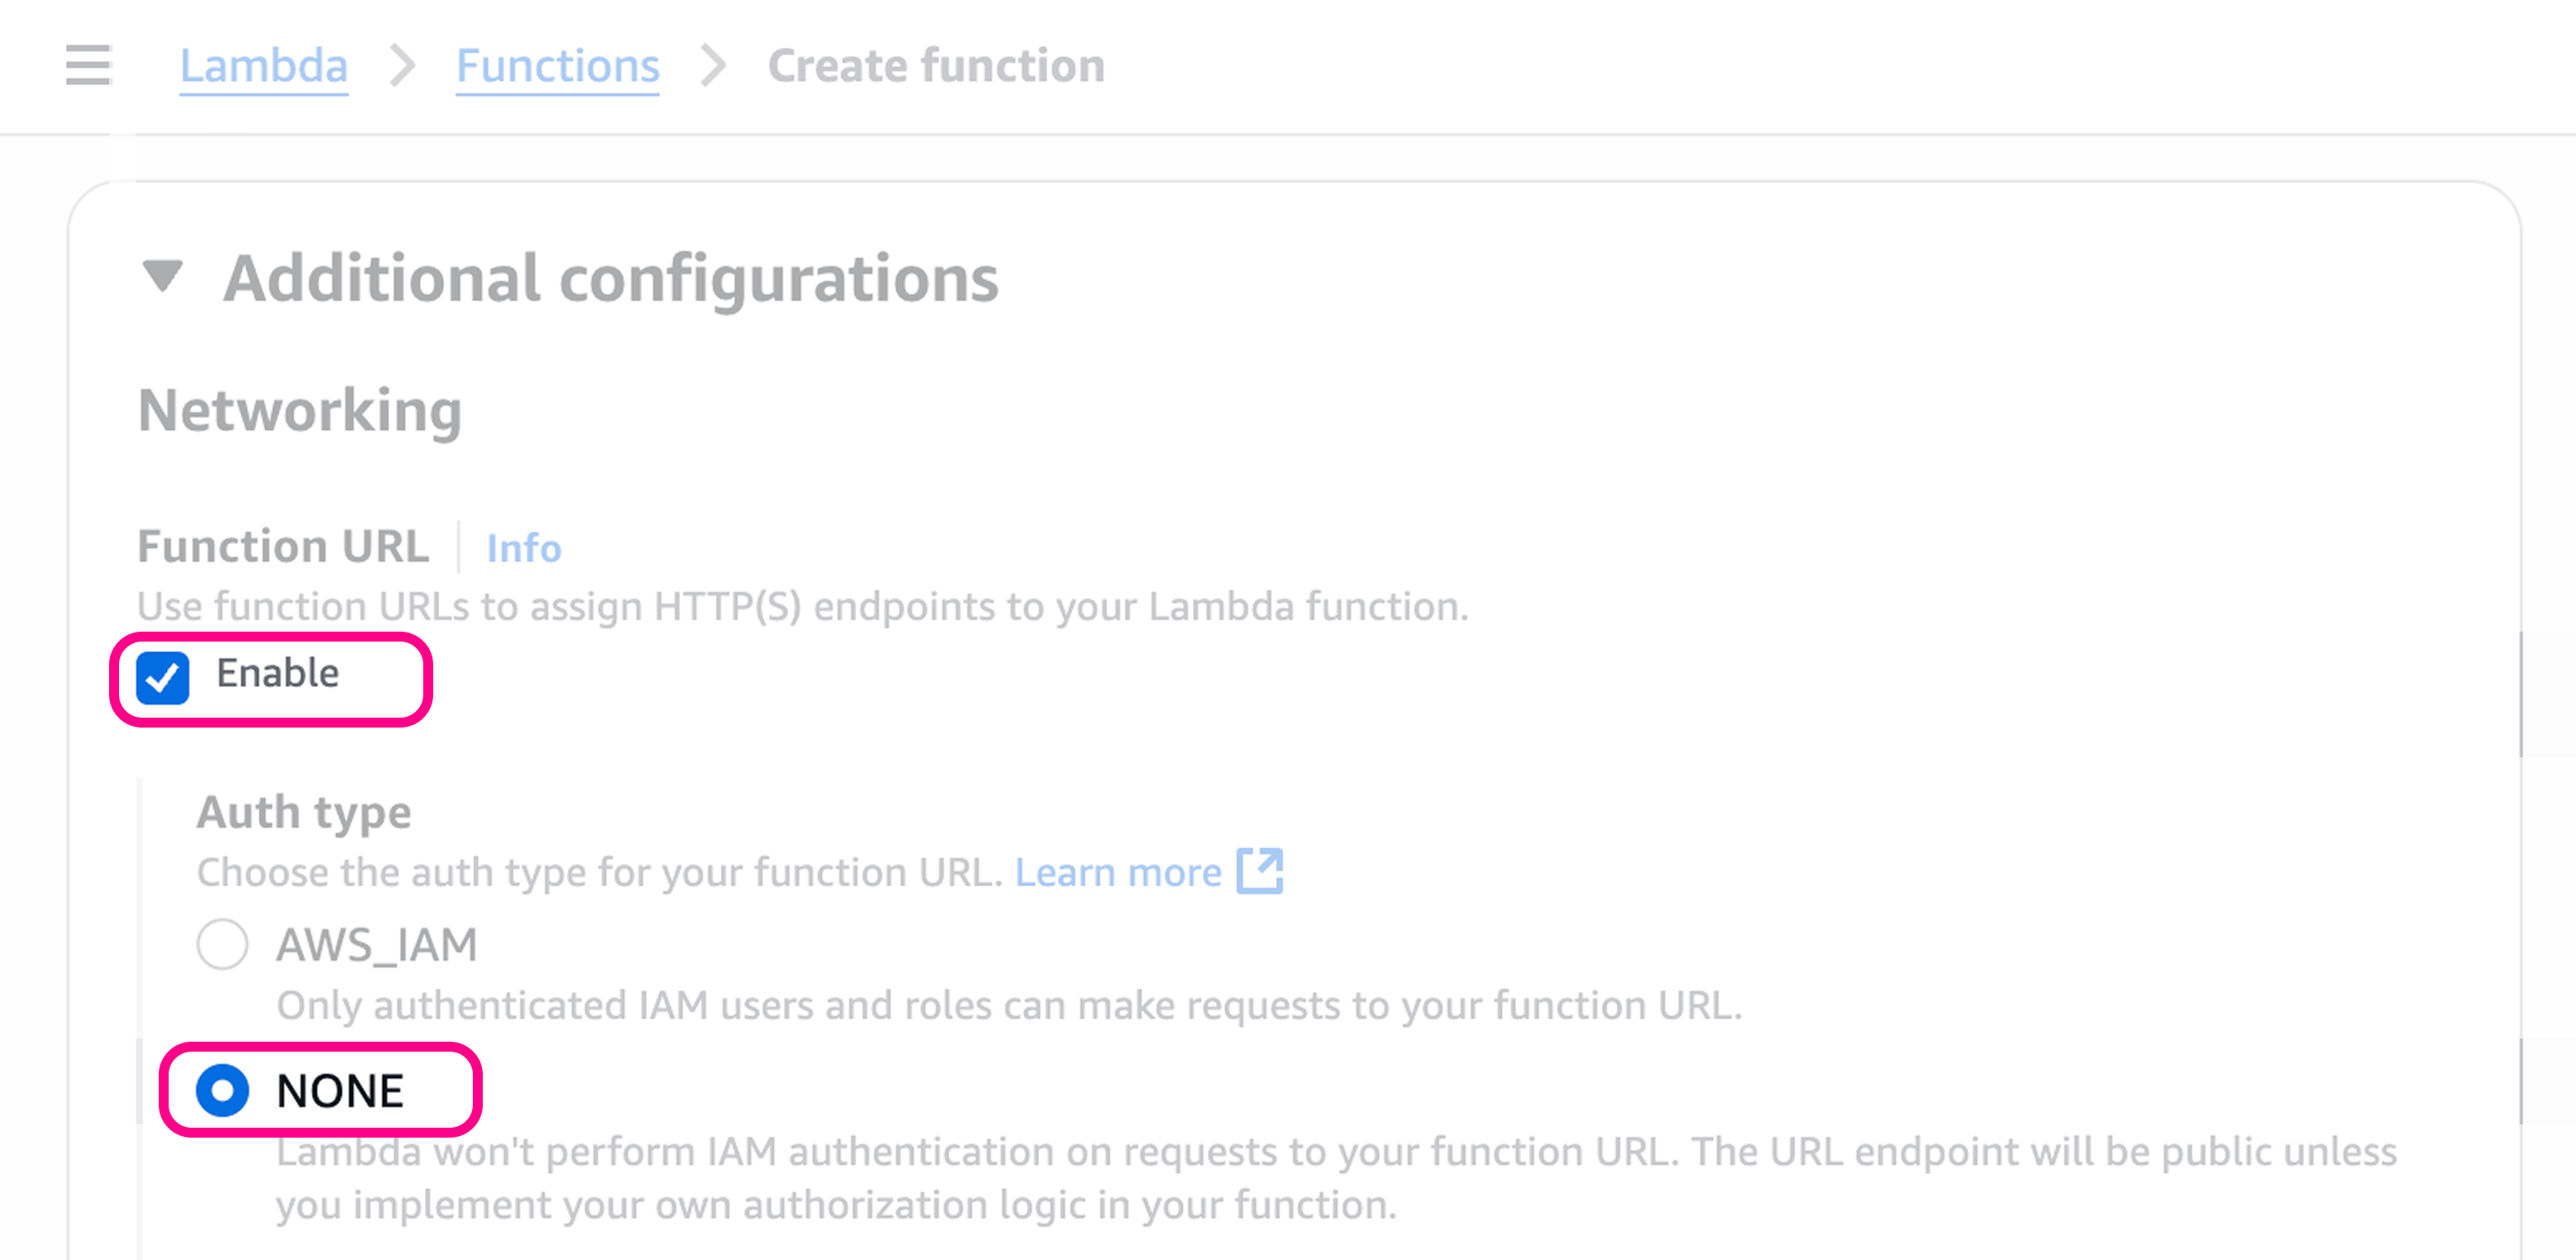
 要为函数获取公共 URL,请前往 **其他配置** > **网络** > **函数 URL**。
将其设置为 **启用**,认证类型为 **NONE**。
要为函数获取公共 URL,请前往 **其他配置** > **网络** > **函数 URL**。
将其设置为 **启用**,认证类型为 **NONE**。
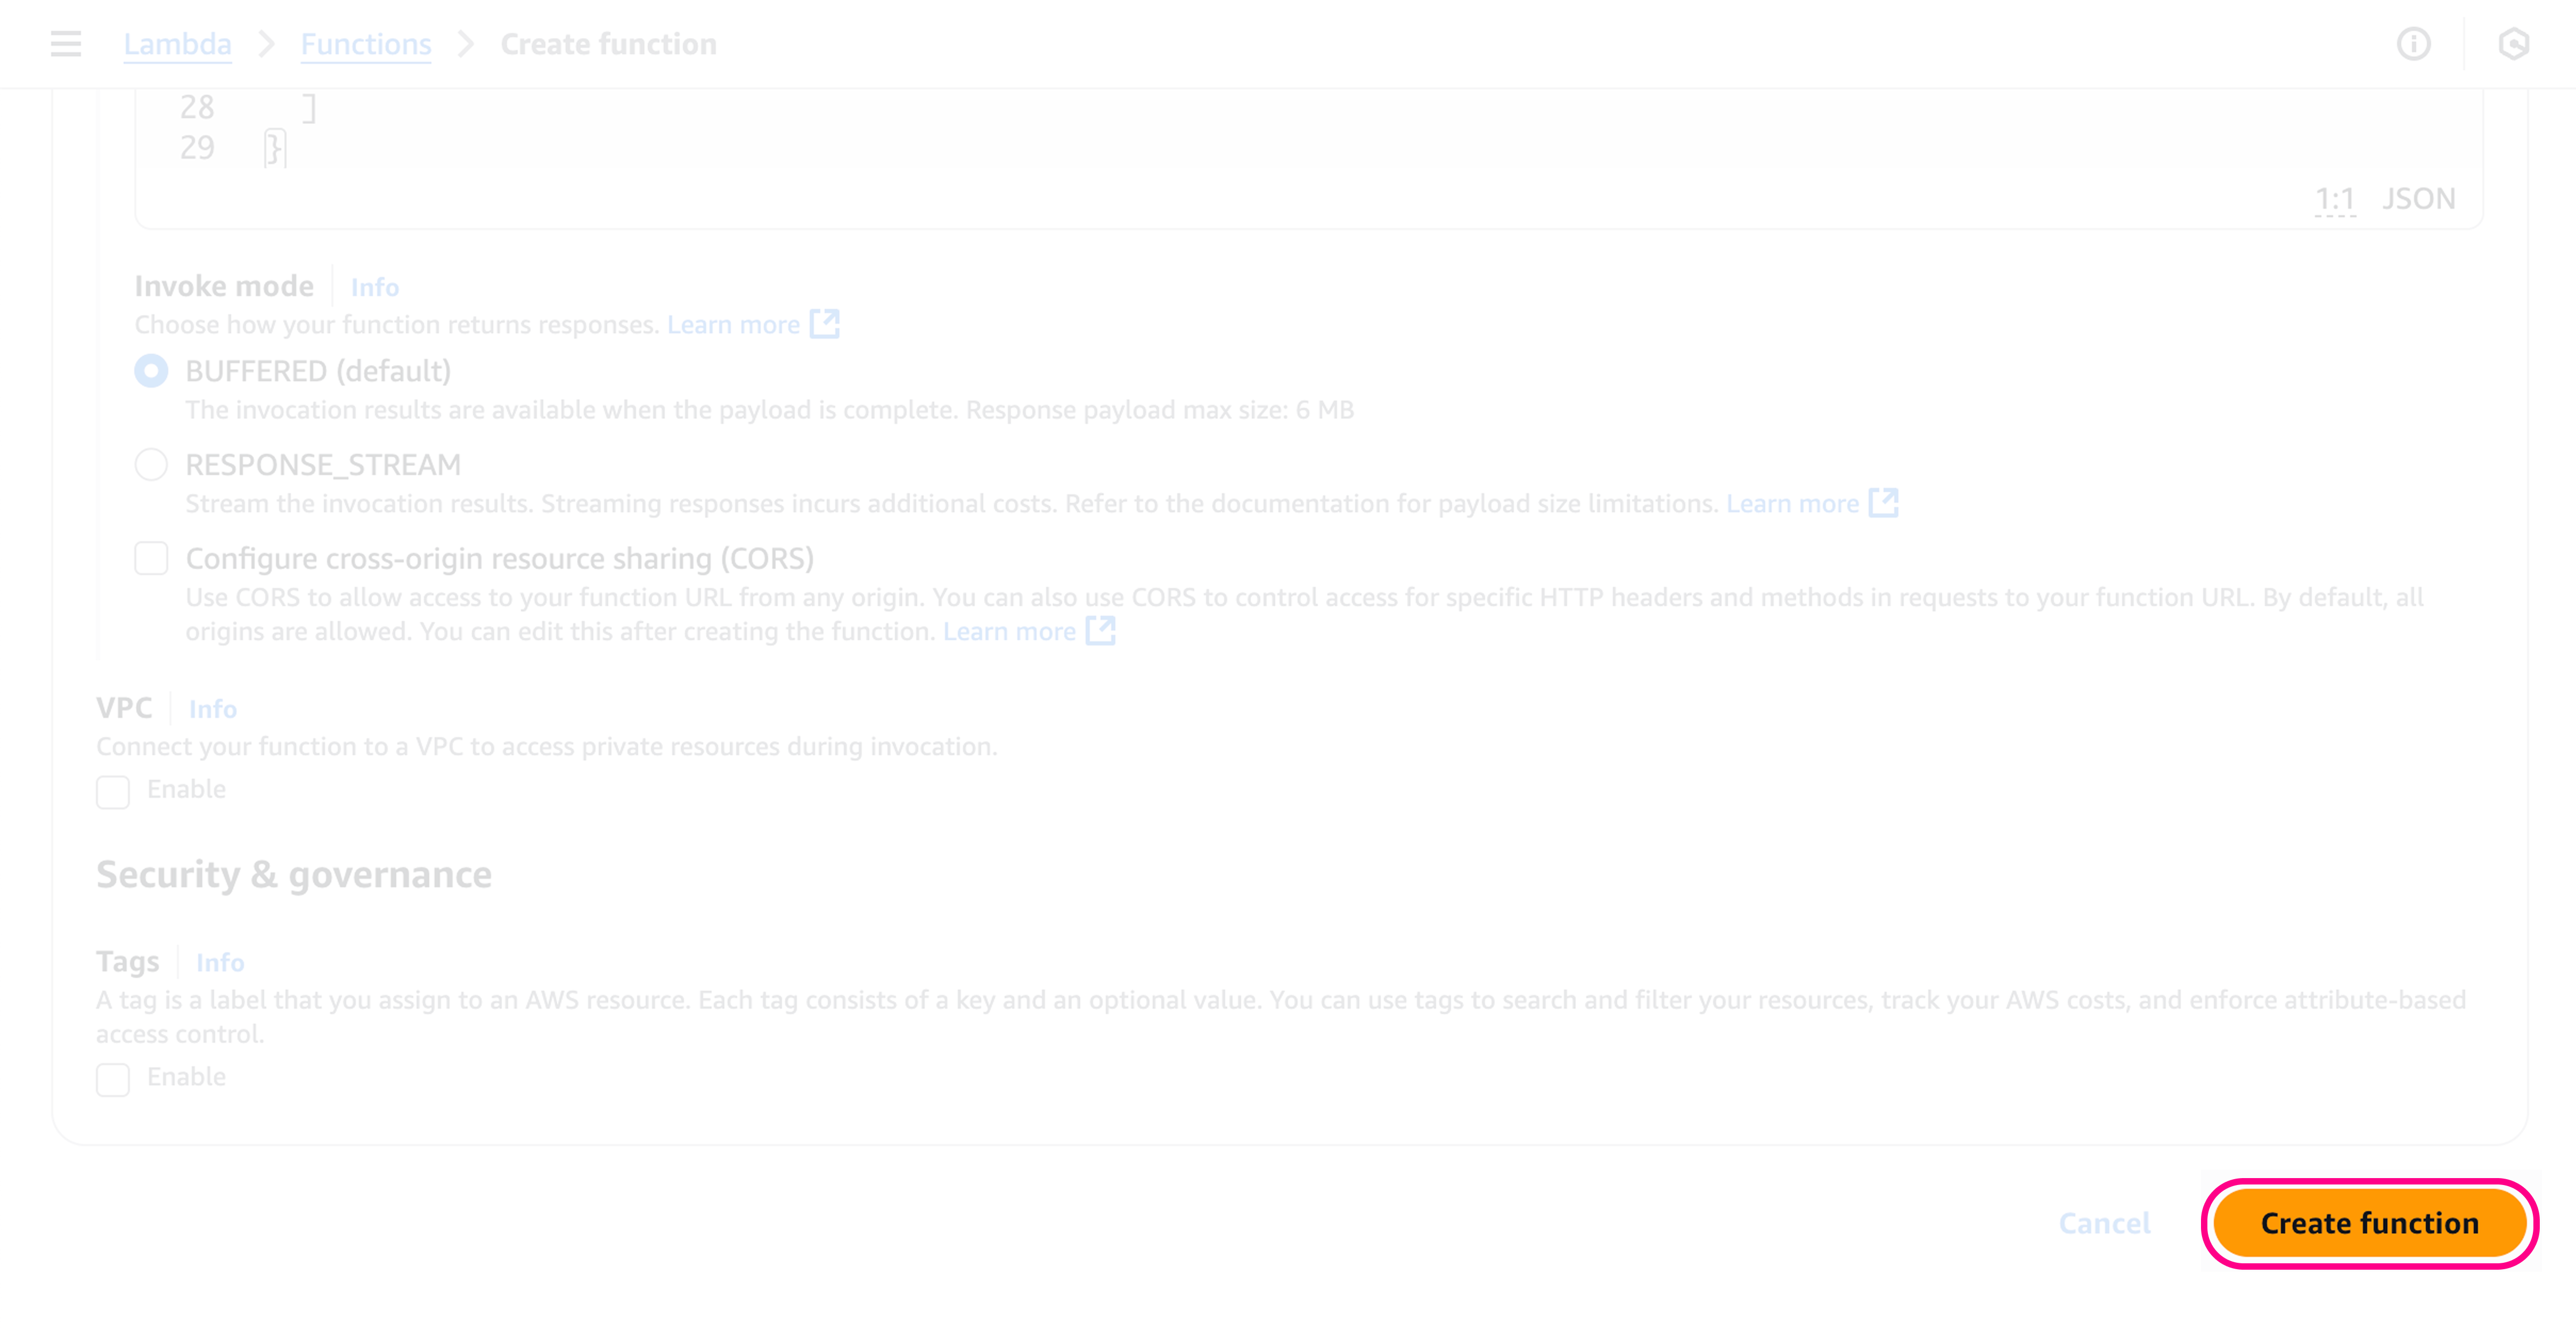
 点击页面底部的 **创建函数**。
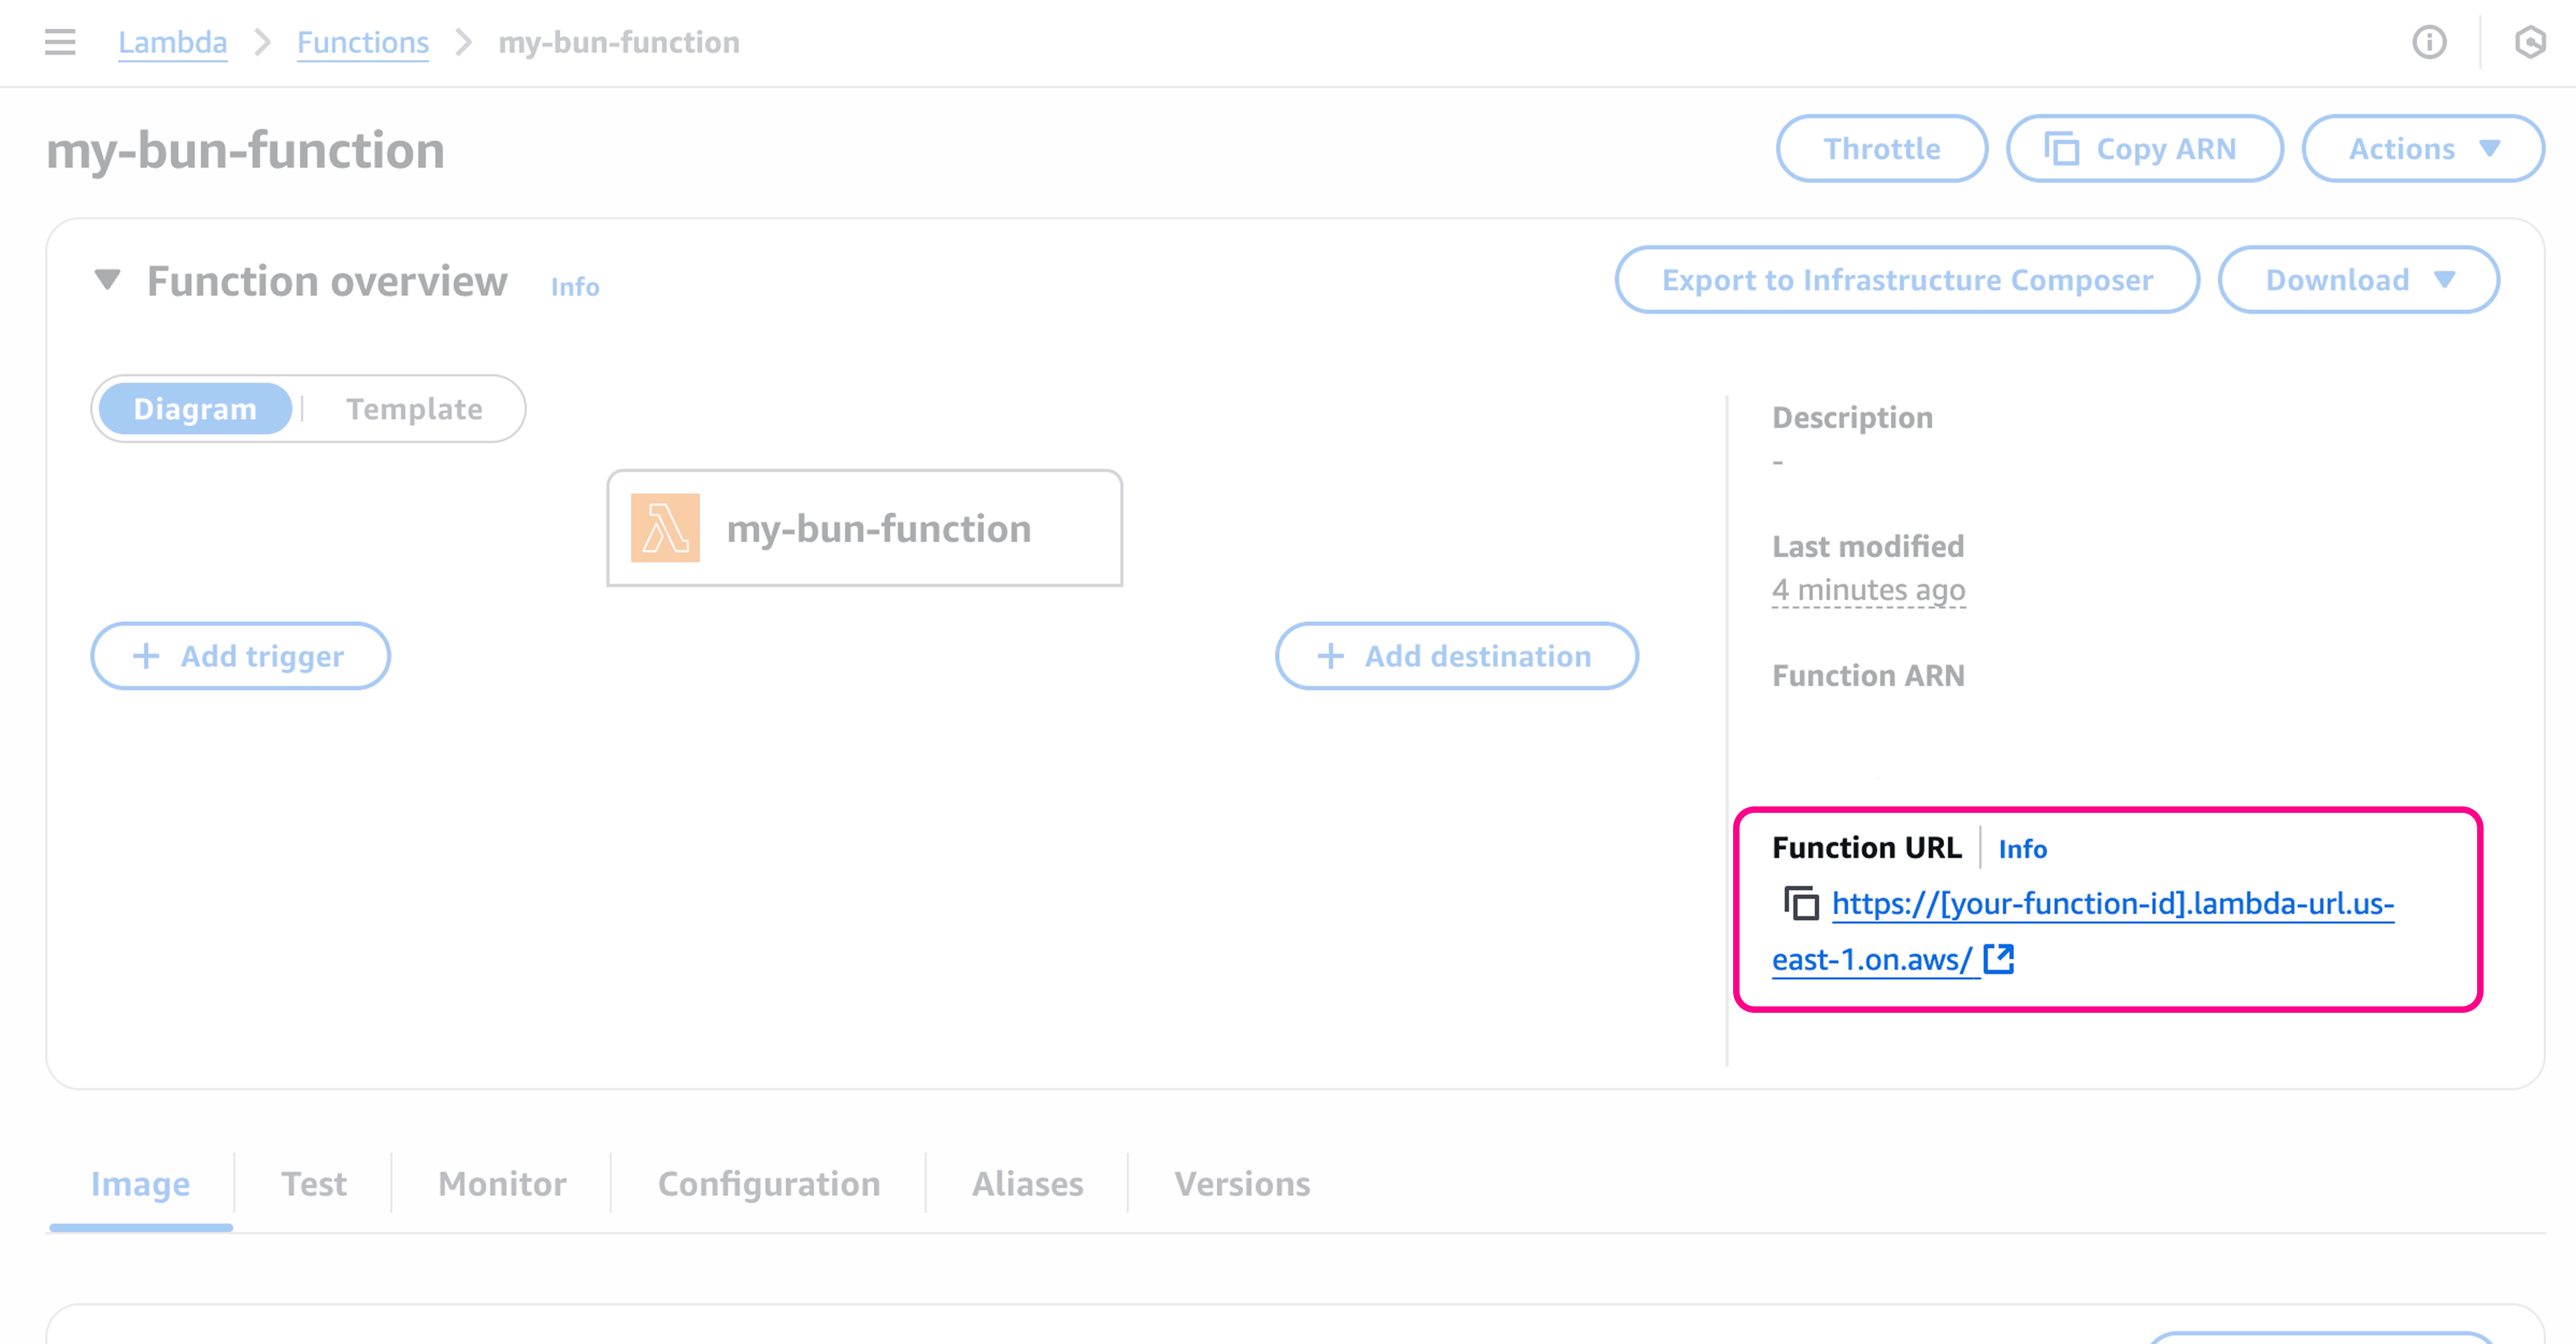
 函数创建完成后,你将被重定向到其页面。函数 URL 位于 **"函数 URL"** 部分。
 你的应用现已上线。要测试函数,可以前往 **测试** 标签页或直接调用函数 URL。
```bash terminal icon="terminal" theme={null}
curl -X GET https://[your-function-id].lambda-url.us-east-1.on.aws/
```
```txt theme={null}
Hello from Bun on Lambda!
```
你的应用现已上线。要测试函数,可以前往 **测试** 标签页或直接调用函数 URL。
```bash terminal icon="terminal" theme={null}
curl -X GET https://[your-function-id].lambda-url.us-east-1.on.aws/
```
```txt theme={null}
Hello from Bun on Lambda!
```