> ## Documentation Index
> Fetch the complete documentation index at: https://bun.ll1025.cn/llms.txt
> Use this file to discover all available pages before exploring further.
# 在 DigitalOcean 上部署 Bun 应用
[DigitalOcean](https://www.digitalocean.com/) 是一个云平台,提供一系列构建和部署应用程序的服务。
本指南使用 `Dockerfile` 将一个 Bun HTTP 服务器部署到 DigitalOcean。
在继续之前,请确保你已准备:
* 一个可供部署的 Bun 应用
* 一个 [DigitalOcean 账户](https://www.digitalocean.com/)
* 已安装并配置好 [DigitalOcean CLI](https://docs.digitalocean.com/reference/doctl/how-to/install/#step-1-install-doctl)
* 已安装 [Docker](https://docs.docker.com/get-started/get-docker/) 并将其添加到你的 `PATH` 中
***
创建一个新的容器仓库,用于存储 Docker 镜像。
在 DigitalOcean 仪表盘中,前往 [**容器仓库**](https://cloud.digitalocean.com/registry),并输入新仓库的详细信息。
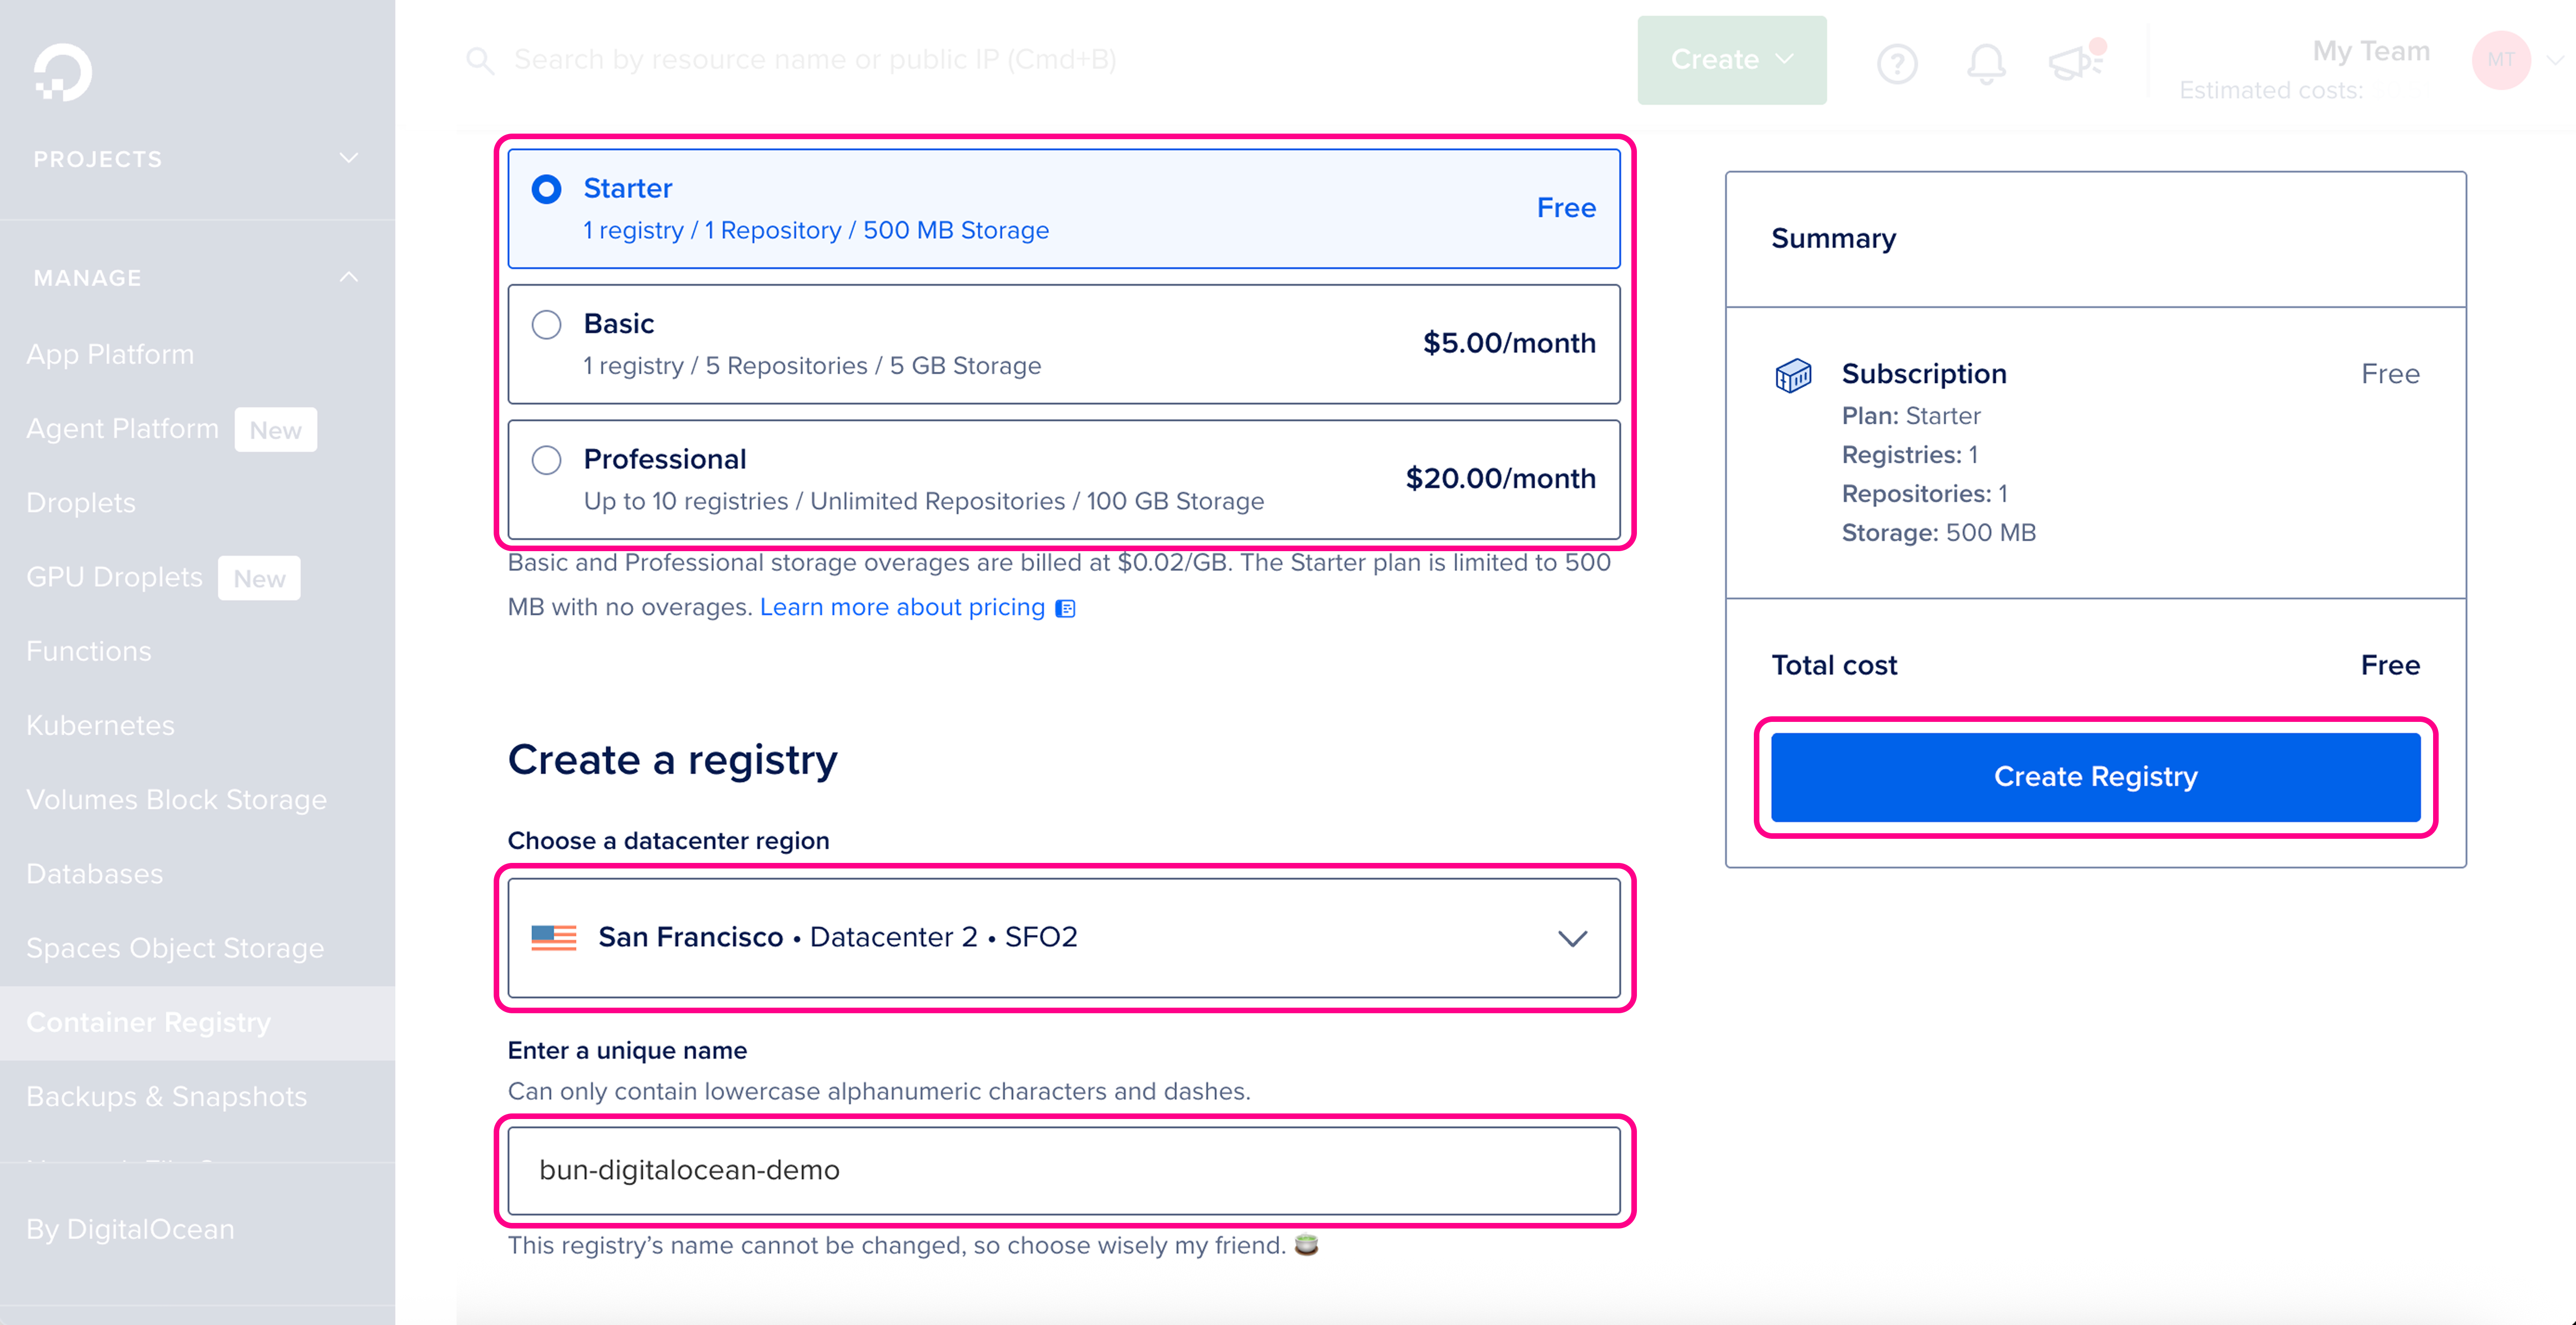 确保详细信息正确,然后点击 **创建仓库**。
```bash terminal icon="terminal" theme={null}
doctl registry create bun-digitalocean-demo
```
```txt theme={null}
Name Endpoint Region slug
bun-digitalocean-demo registry.digitalocean.com/bun-digitalocean-demo sfo2
```
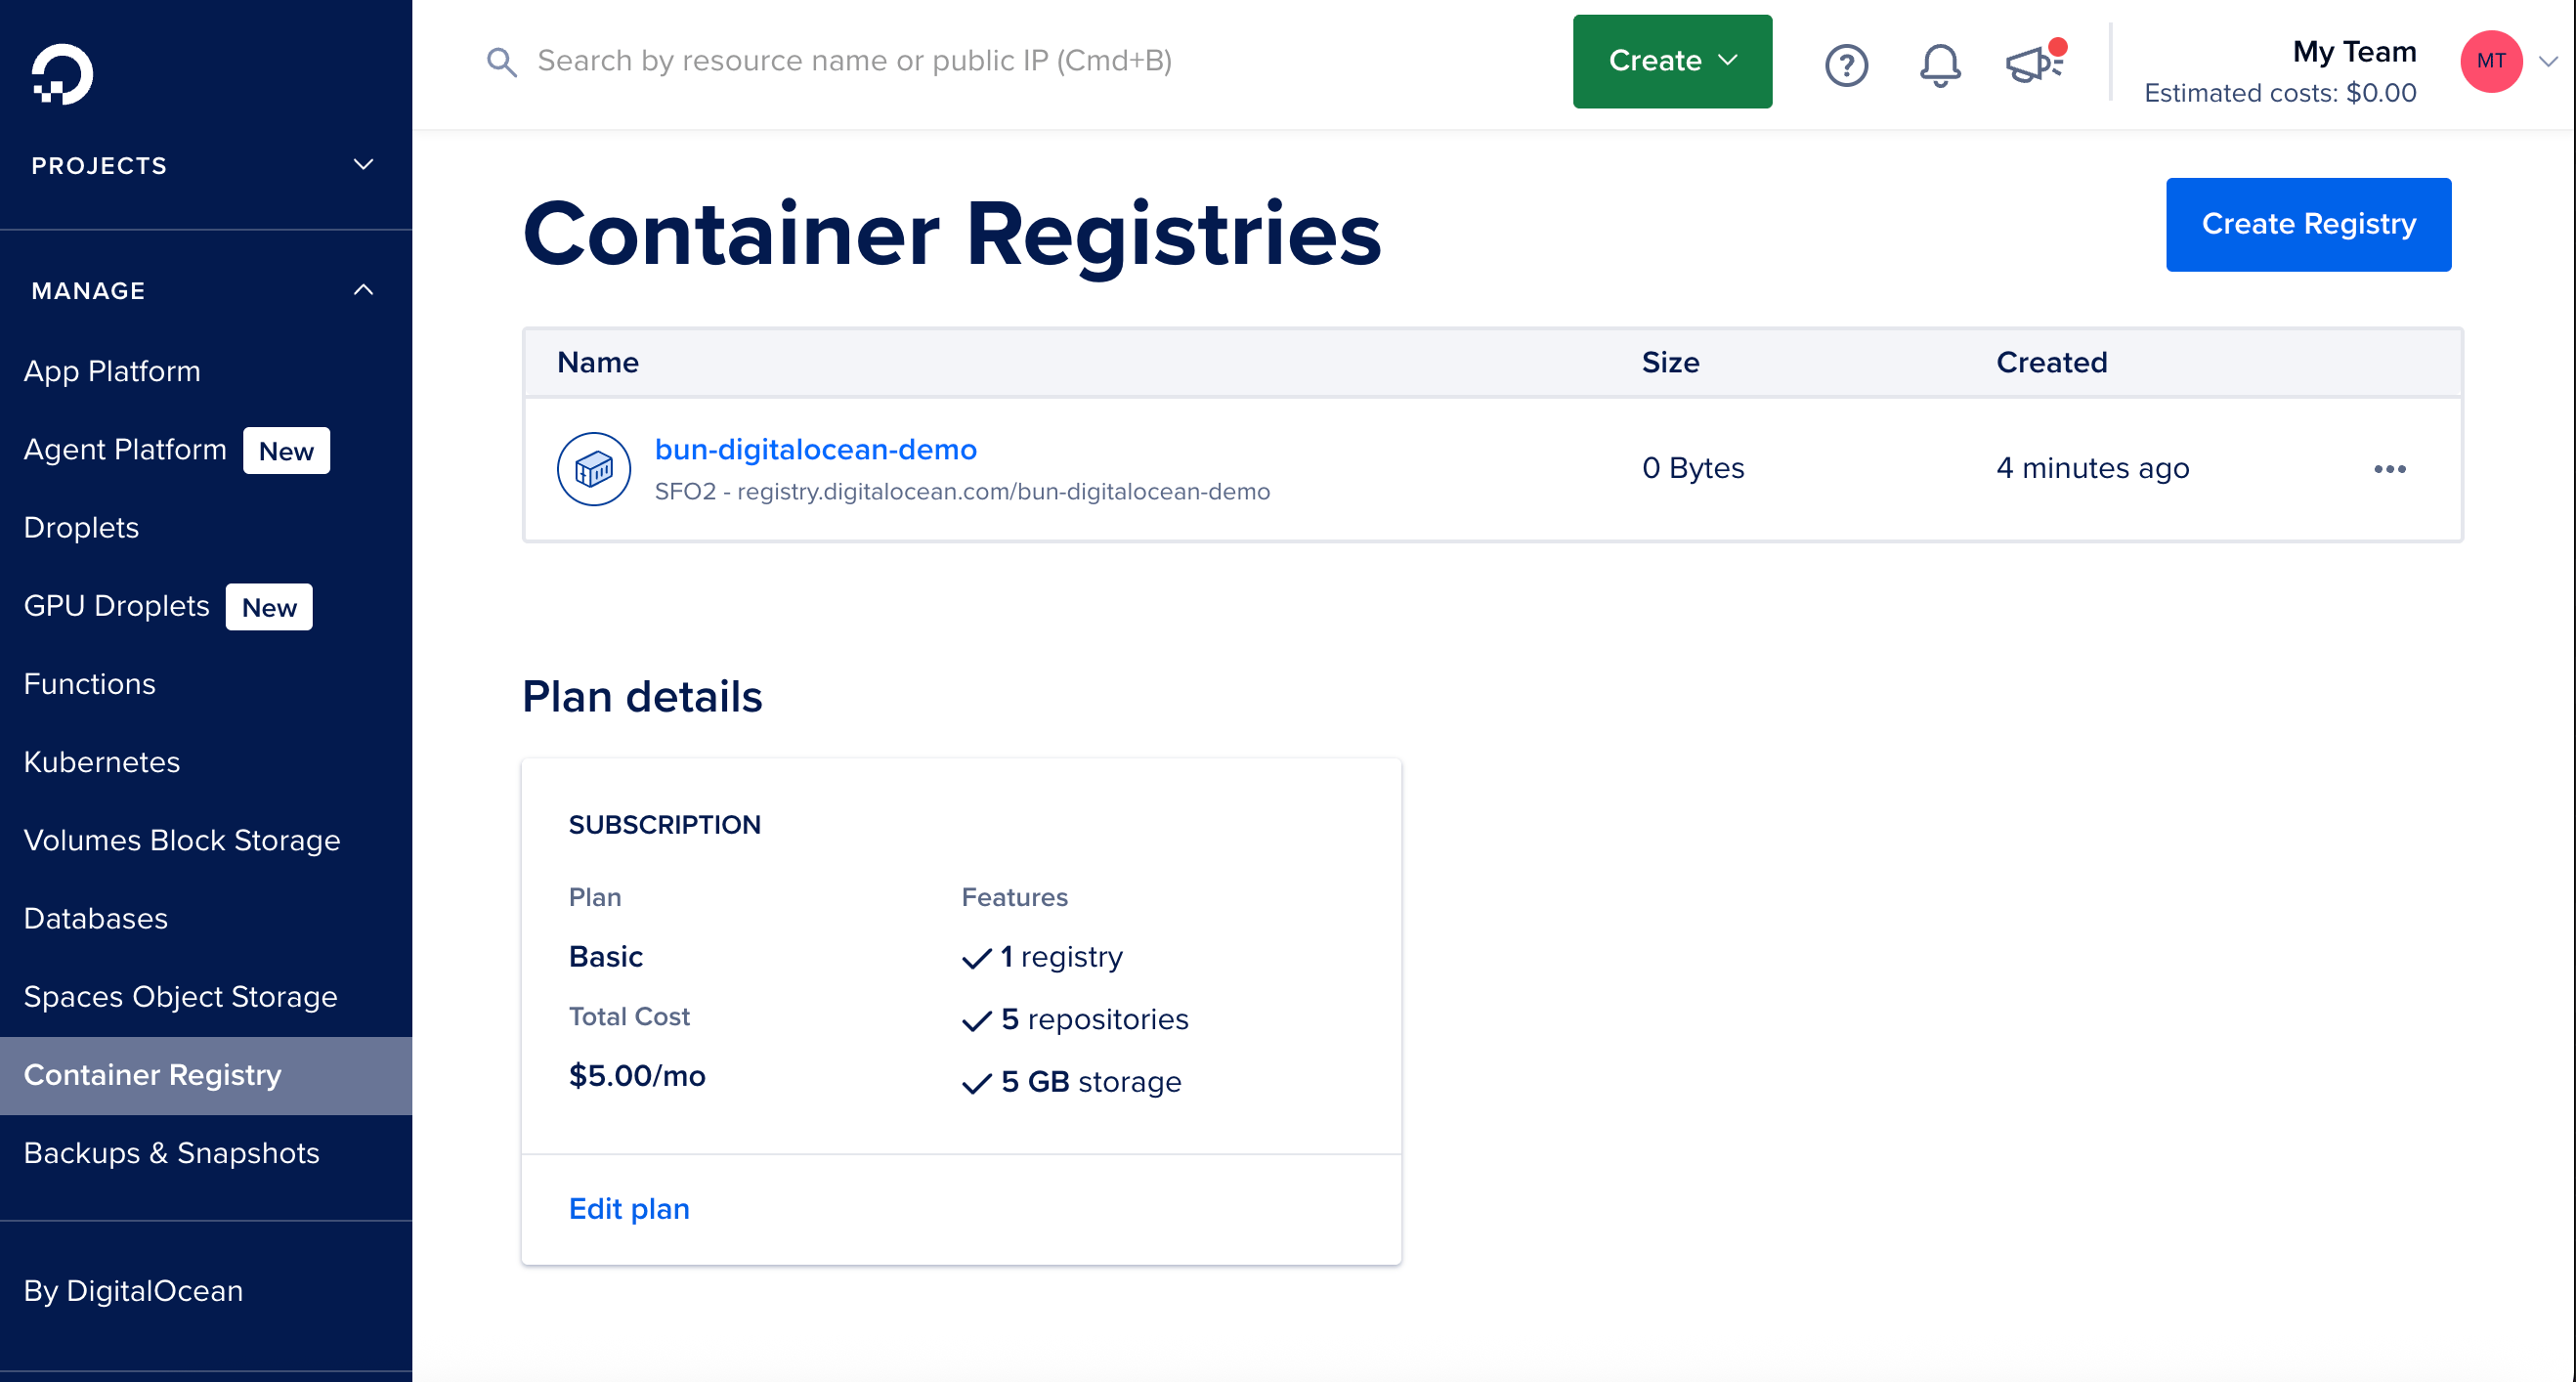
你应该可以在 [**DigitalOcean 仓库仪表盘**](https://cloud.digitalocean.com/registry) 中看到新仓库:
确保详细信息正确,然后点击 **创建仓库**。
```bash terminal icon="terminal" theme={null}
doctl registry create bun-digitalocean-demo
```
```txt theme={null}
Name Endpoint Region slug
bun-digitalocean-demo registry.digitalocean.com/bun-digitalocean-demo sfo2
```
你应该可以在 [**DigitalOcean 仓库仪表盘**](https://cloud.digitalocean.com/registry) 中看到新仓库:
 在项目的根目录下创建一个新的 `Dockerfile`。该文件包含初始化容器、将本地项目文件复制到其中、安装依赖和启动应用程序的指令。
```docker Dockerfile icon="docker" theme={null}
# 使用官方 Bun 镜像来运行应用程序
FROM oven/bun:debian
# 设置工作目录为 `/app`
WORKDIR /app
# 将 package.json 和 bun.lock 复制到容器中
COPY package.json bun.lock ./
# 安装依赖
RUN bun install --production --frozen-lockfile
# 将应用程序的其余部分复制到容器中
COPY . .
# 暴露端口(DigitalOcean 会设置 PORT 环境变量)
EXPOSE 8080
# 运行应用程序
CMD ["bun", "index.ts"]
```
确保启动命令与你的应用程序入口点对应。如果你的 `package.json` 中有 start 脚本,也可以是 `CMD ["bun", "run", "start"]`。
如果你的应用没有依赖项,可以省略 `RUN bun install --production --frozen-lockfile` 这一行。
在项目的根目录下创建一个新的 `.dockerignore` 文件。它列出了要从容器镜像中\_排除\_的文件和目录,例如 `node_modules`,这有助于使构建更快、更小:
```docker .dockerignore icon="Docker" theme={null}
node_modules
Dockerfile*
.dockerignore
.git
.gitignore
README.md
LICENSE
.vscode
.env
# 任何其他你想要排除的文件或目录
```
在构建和推送 Docker 镜像之前,先将 Docker 与 DigitalOcean 容器仓库进行身份验证:
```bash terminal icon="terminal" theme={null}
doctl registry login
```
```txt theme={null}
已成功通过 registry.digitalocean.com 进行身份验证
```
此命令使用你的 DigitalOcean 凭证将 Docker 与 DigitalOcean 的仓库进行身份验证。如果没有此步骤,构建和推送命令将失败并返回 401 认证错误。
确保你在包含 `Dockerfile` 的目录中,然后通过一个命令构建 Docker 镜像并将其推送到 DigitalOcean 仓库:
```bash terminal icon="terminal" theme={null}
docker buildx build --platform=linux/amd64 -t registry.digitalocean.com/bun-digitalocean-demo/bun-digitalocean-demo:latest --push .
```
如果你在 ARM Mac (M1/M2) 上构建,必须使用 `docker buildx` 和 `--platform=linux/amd64` 以确保与 DigitalOcean 的基础设施兼容。如果使用 `docker build` 而不带平台标志,将创建一个 ARM64 镜像,该镜像无法在 DigitalOcean 上运行。
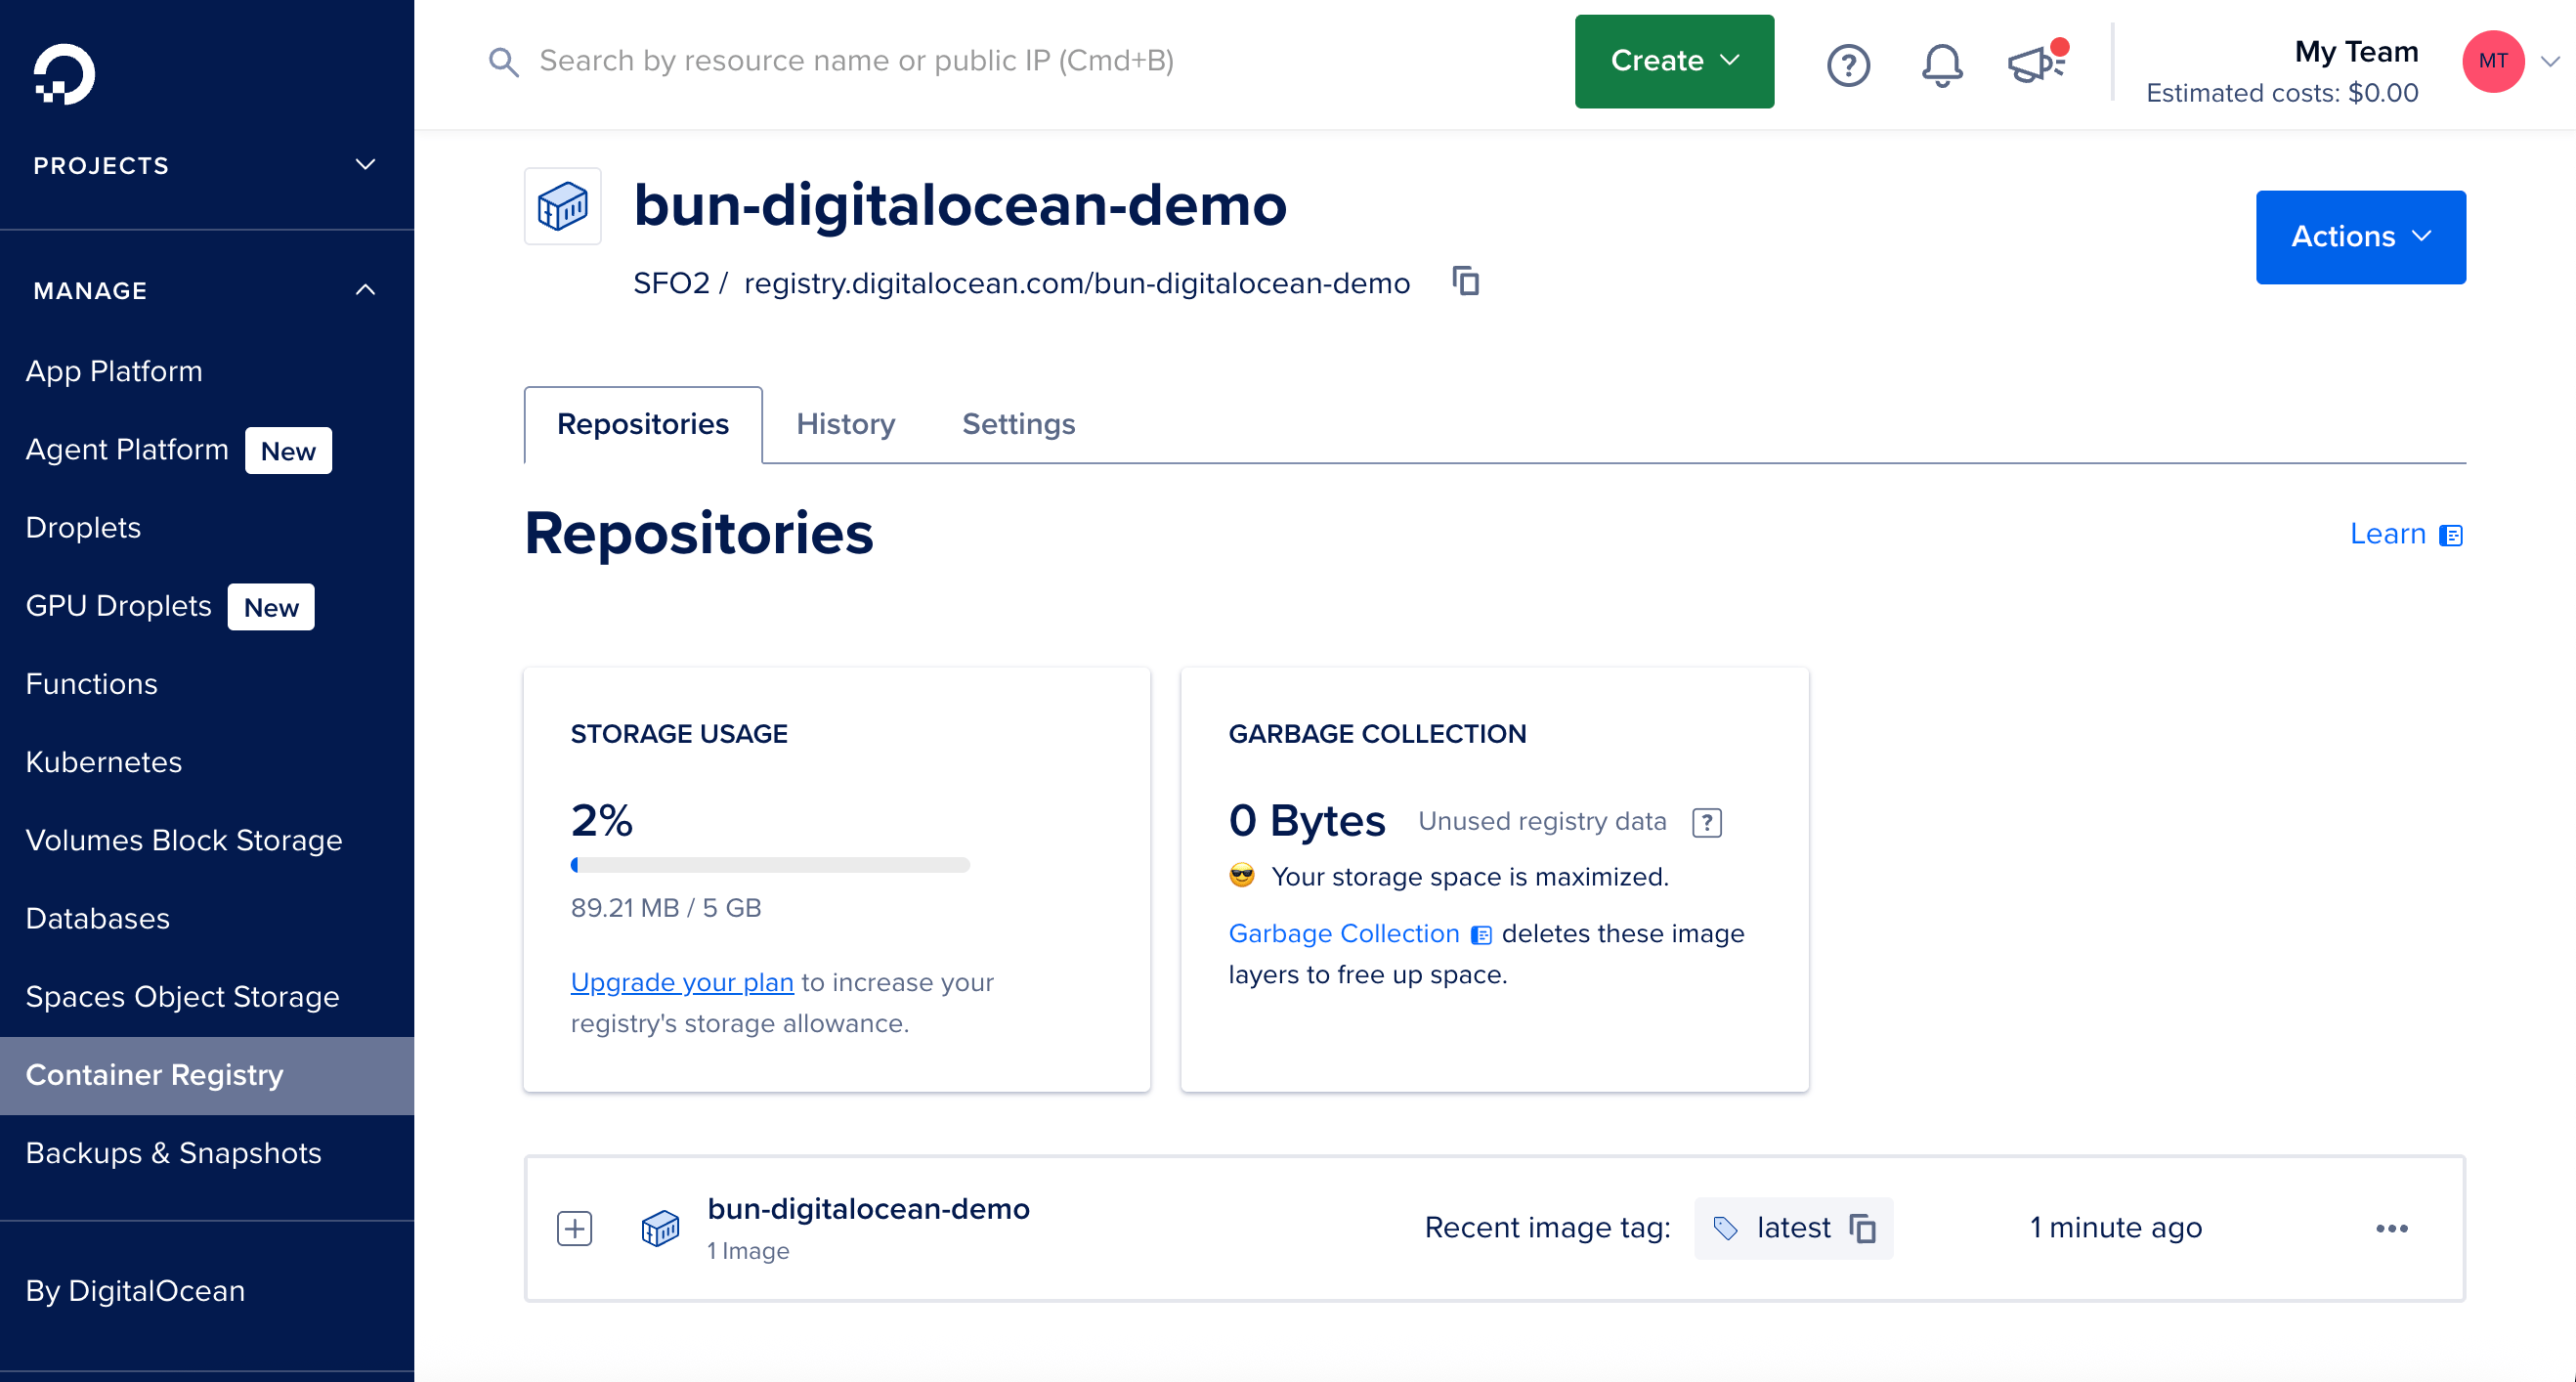
镜像推送完成后,你应该可以在 [**DigitalOcean 仓库仪表盘**](https://cloud.digitalocean.com/registry) 中看到它:
在项目的根目录下创建一个新的 `Dockerfile`。该文件包含初始化容器、将本地项目文件复制到其中、安装依赖和启动应用程序的指令。
```docker Dockerfile icon="docker" theme={null}
# 使用官方 Bun 镜像来运行应用程序
FROM oven/bun:debian
# 设置工作目录为 `/app`
WORKDIR /app
# 将 package.json 和 bun.lock 复制到容器中
COPY package.json bun.lock ./
# 安装依赖
RUN bun install --production --frozen-lockfile
# 将应用程序的其余部分复制到容器中
COPY . .
# 暴露端口(DigitalOcean 会设置 PORT 环境变量)
EXPOSE 8080
# 运行应用程序
CMD ["bun", "index.ts"]
```
确保启动命令与你的应用程序入口点对应。如果你的 `package.json` 中有 start 脚本,也可以是 `CMD ["bun", "run", "start"]`。
如果你的应用没有依赖项,可以省略 `RUN bun install --production --frozen-lockfile` 这一行。
在项目的根目录下创建一个新的 `.dockerignore` 文件。它列出了要从容器镜像中\_排除\_的文件和目录,例如 `node_modules`,这有助于使构建更快、更小:
```docker .dockerignore icon="Docker" theme={null}
node_modules
Dockerfile*
.dockerignore
.git
.gitignore
README.md
LICENSE
.vscode
.env
# 任何其他你想要排除的文件或目录
```
在构建和推送 Docker 镜像之前,先将 Docker 与 DigitalOcean 容器仓库进行身份验证:
```bash terminal icon="terminal" theme={null}
doctl registry login
```
```txt theme={null}
已成功通过 registry.digitalocean.com 进行身份验证
```
此命令使用你的 DigitalOcean 凭证将 Docker 与 DigitalOcean 的仓库进行身份验证。如果没有此步骤,构建和推送命令将失败并返回 401 认证错误。
确保你在包含 `Dockerfile` 的目录中,然后通过一个命令构建 Docker 镜像并将其推送到 DigitalOcean 仓库:
```bash terminal icon="terminal" theme={null}
docker buildx build --platform=linux/amd64 -t registry.digitalocean.com/bun-digitalocean-demo/bun-digitalocean-demo:latest --push .
```
如果你在 ARM Mac (M1/M2) 上构建,必须使用 `docker buildx` 和 `--platform=linux/amd64` 以确保与 DigitalOcean 的基础设施兼容。如果使用 `docker build` 而不带平台标志,将创建一个 ARM64 镜像,该镜像无法在 DigitalOcean 上运行。
镜像推送完成后,你应该可以在 [**DigitalOcean 仓库仪表盘**](https://cloud.digitalocean.com/registry) 中看到它:
 在 DigitalOcean 仪表盘中,前往 [**App Platform**](https://cloud.digitalocean.com/apps) > **创建应用**。你可以直接从容器镜像创建项目。
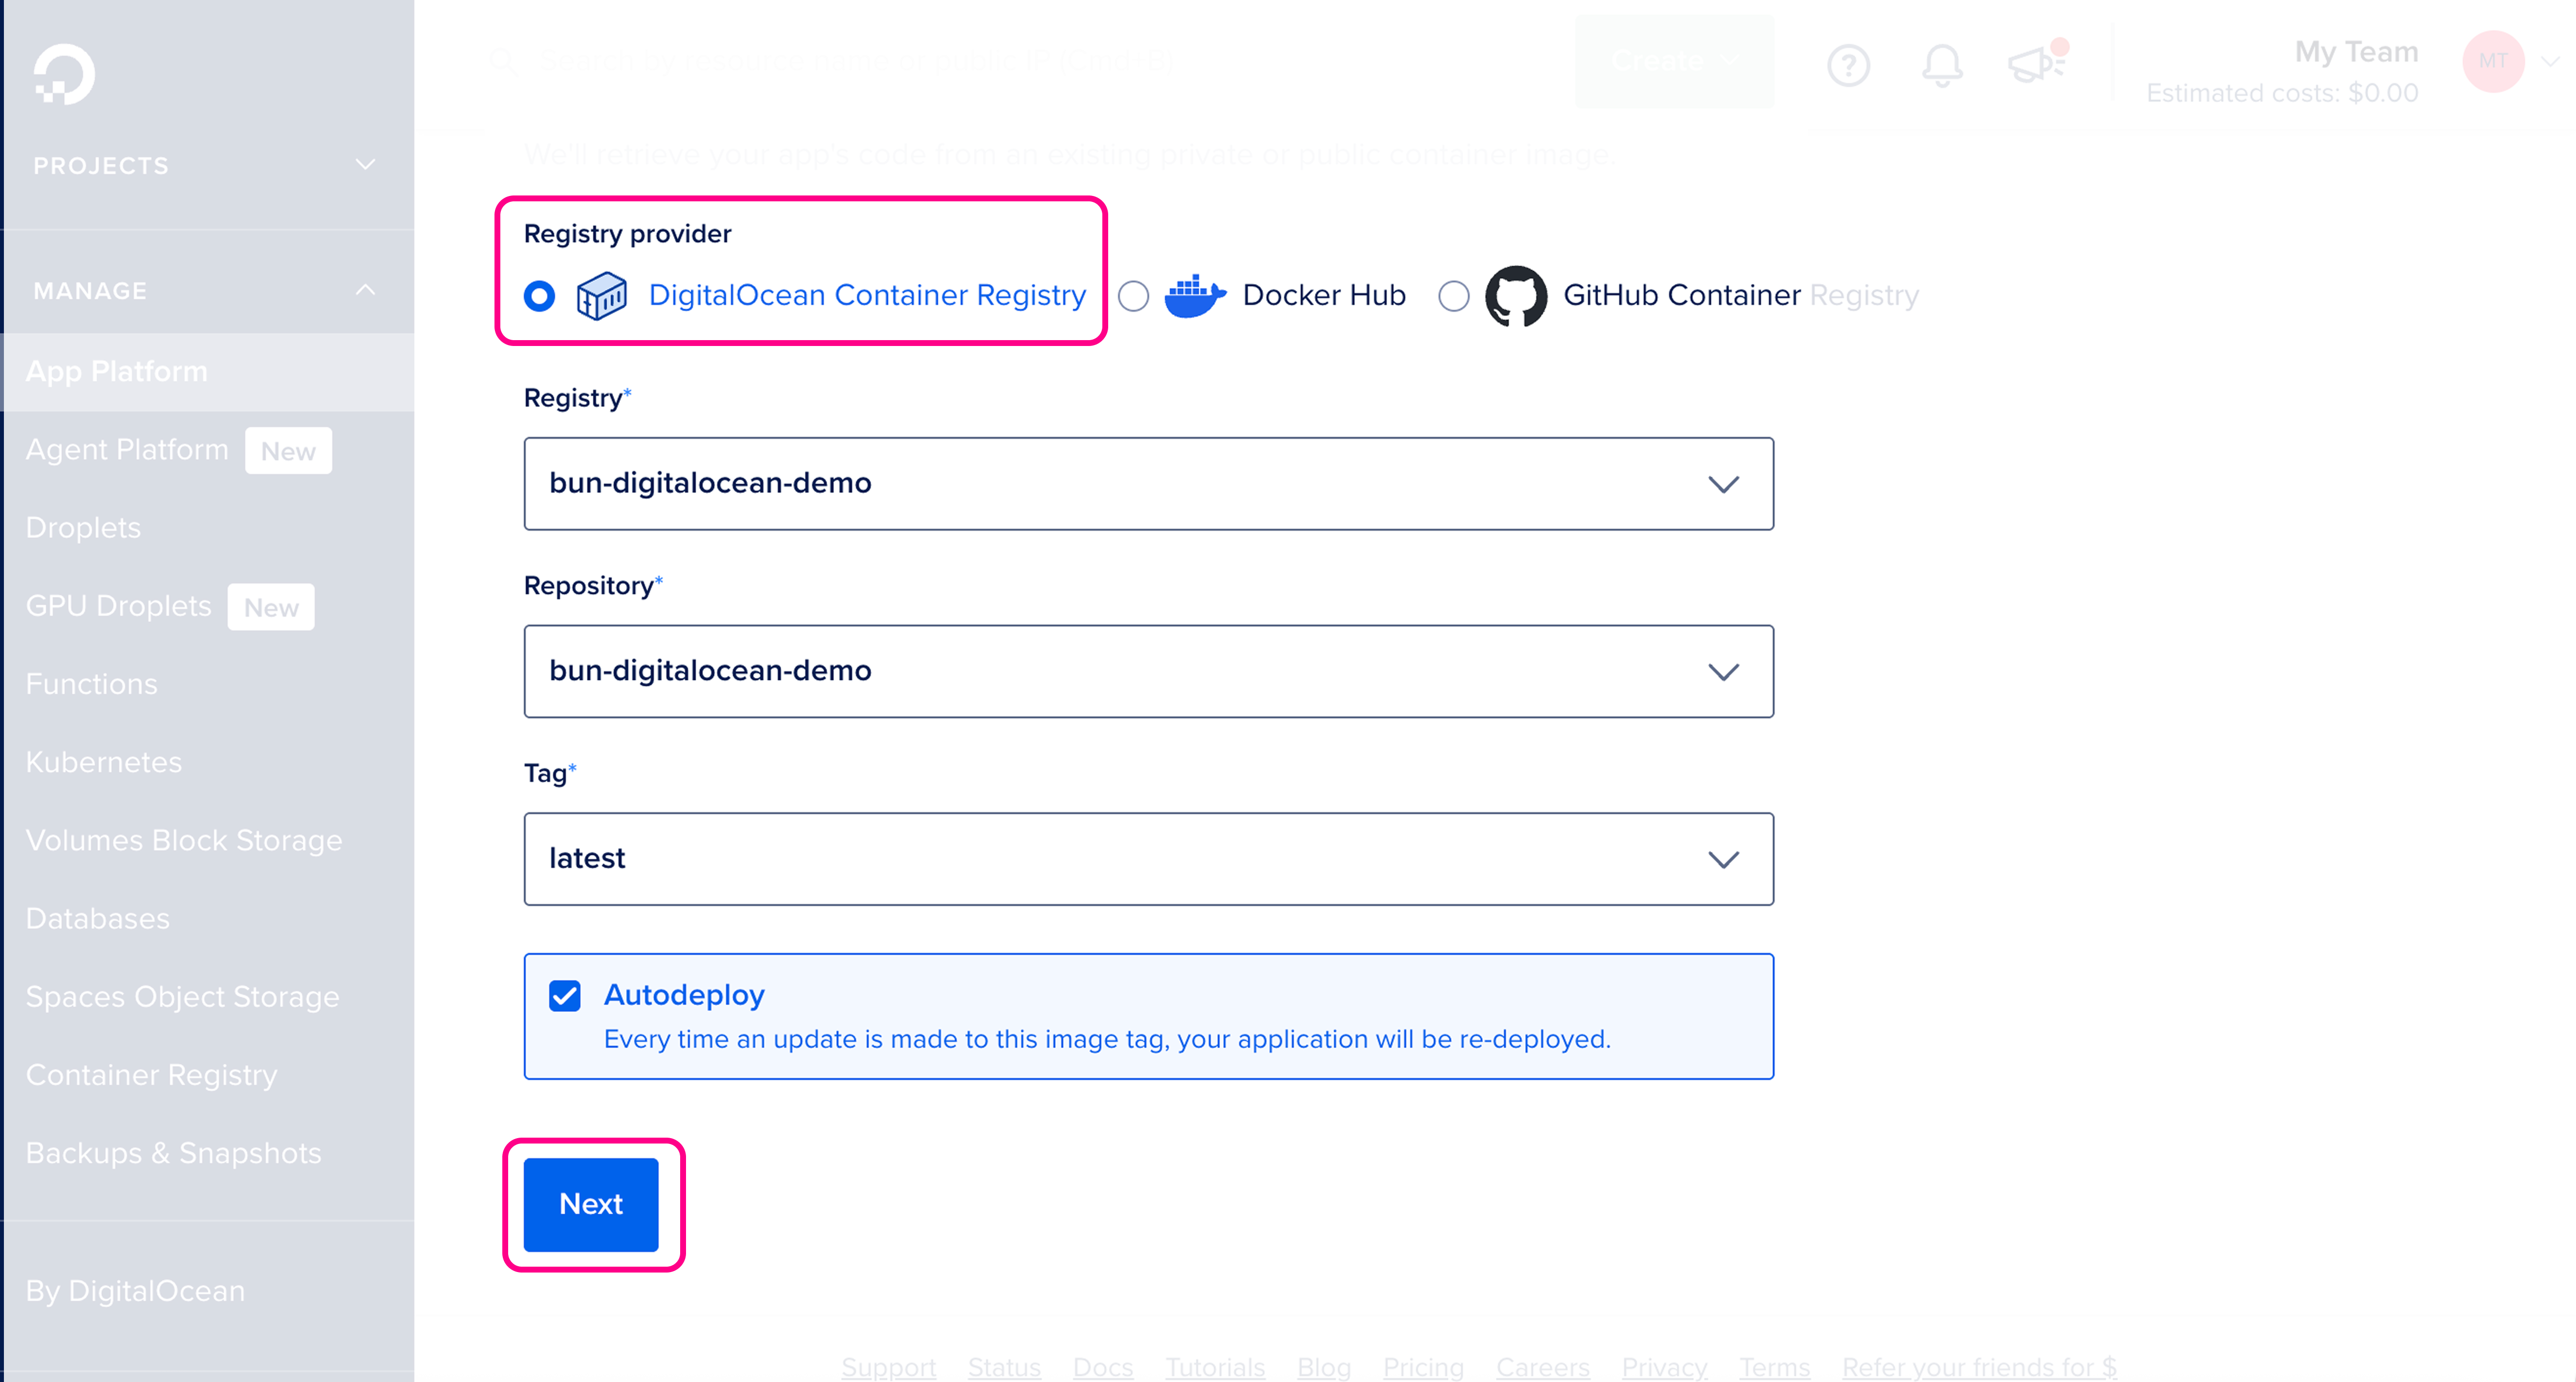
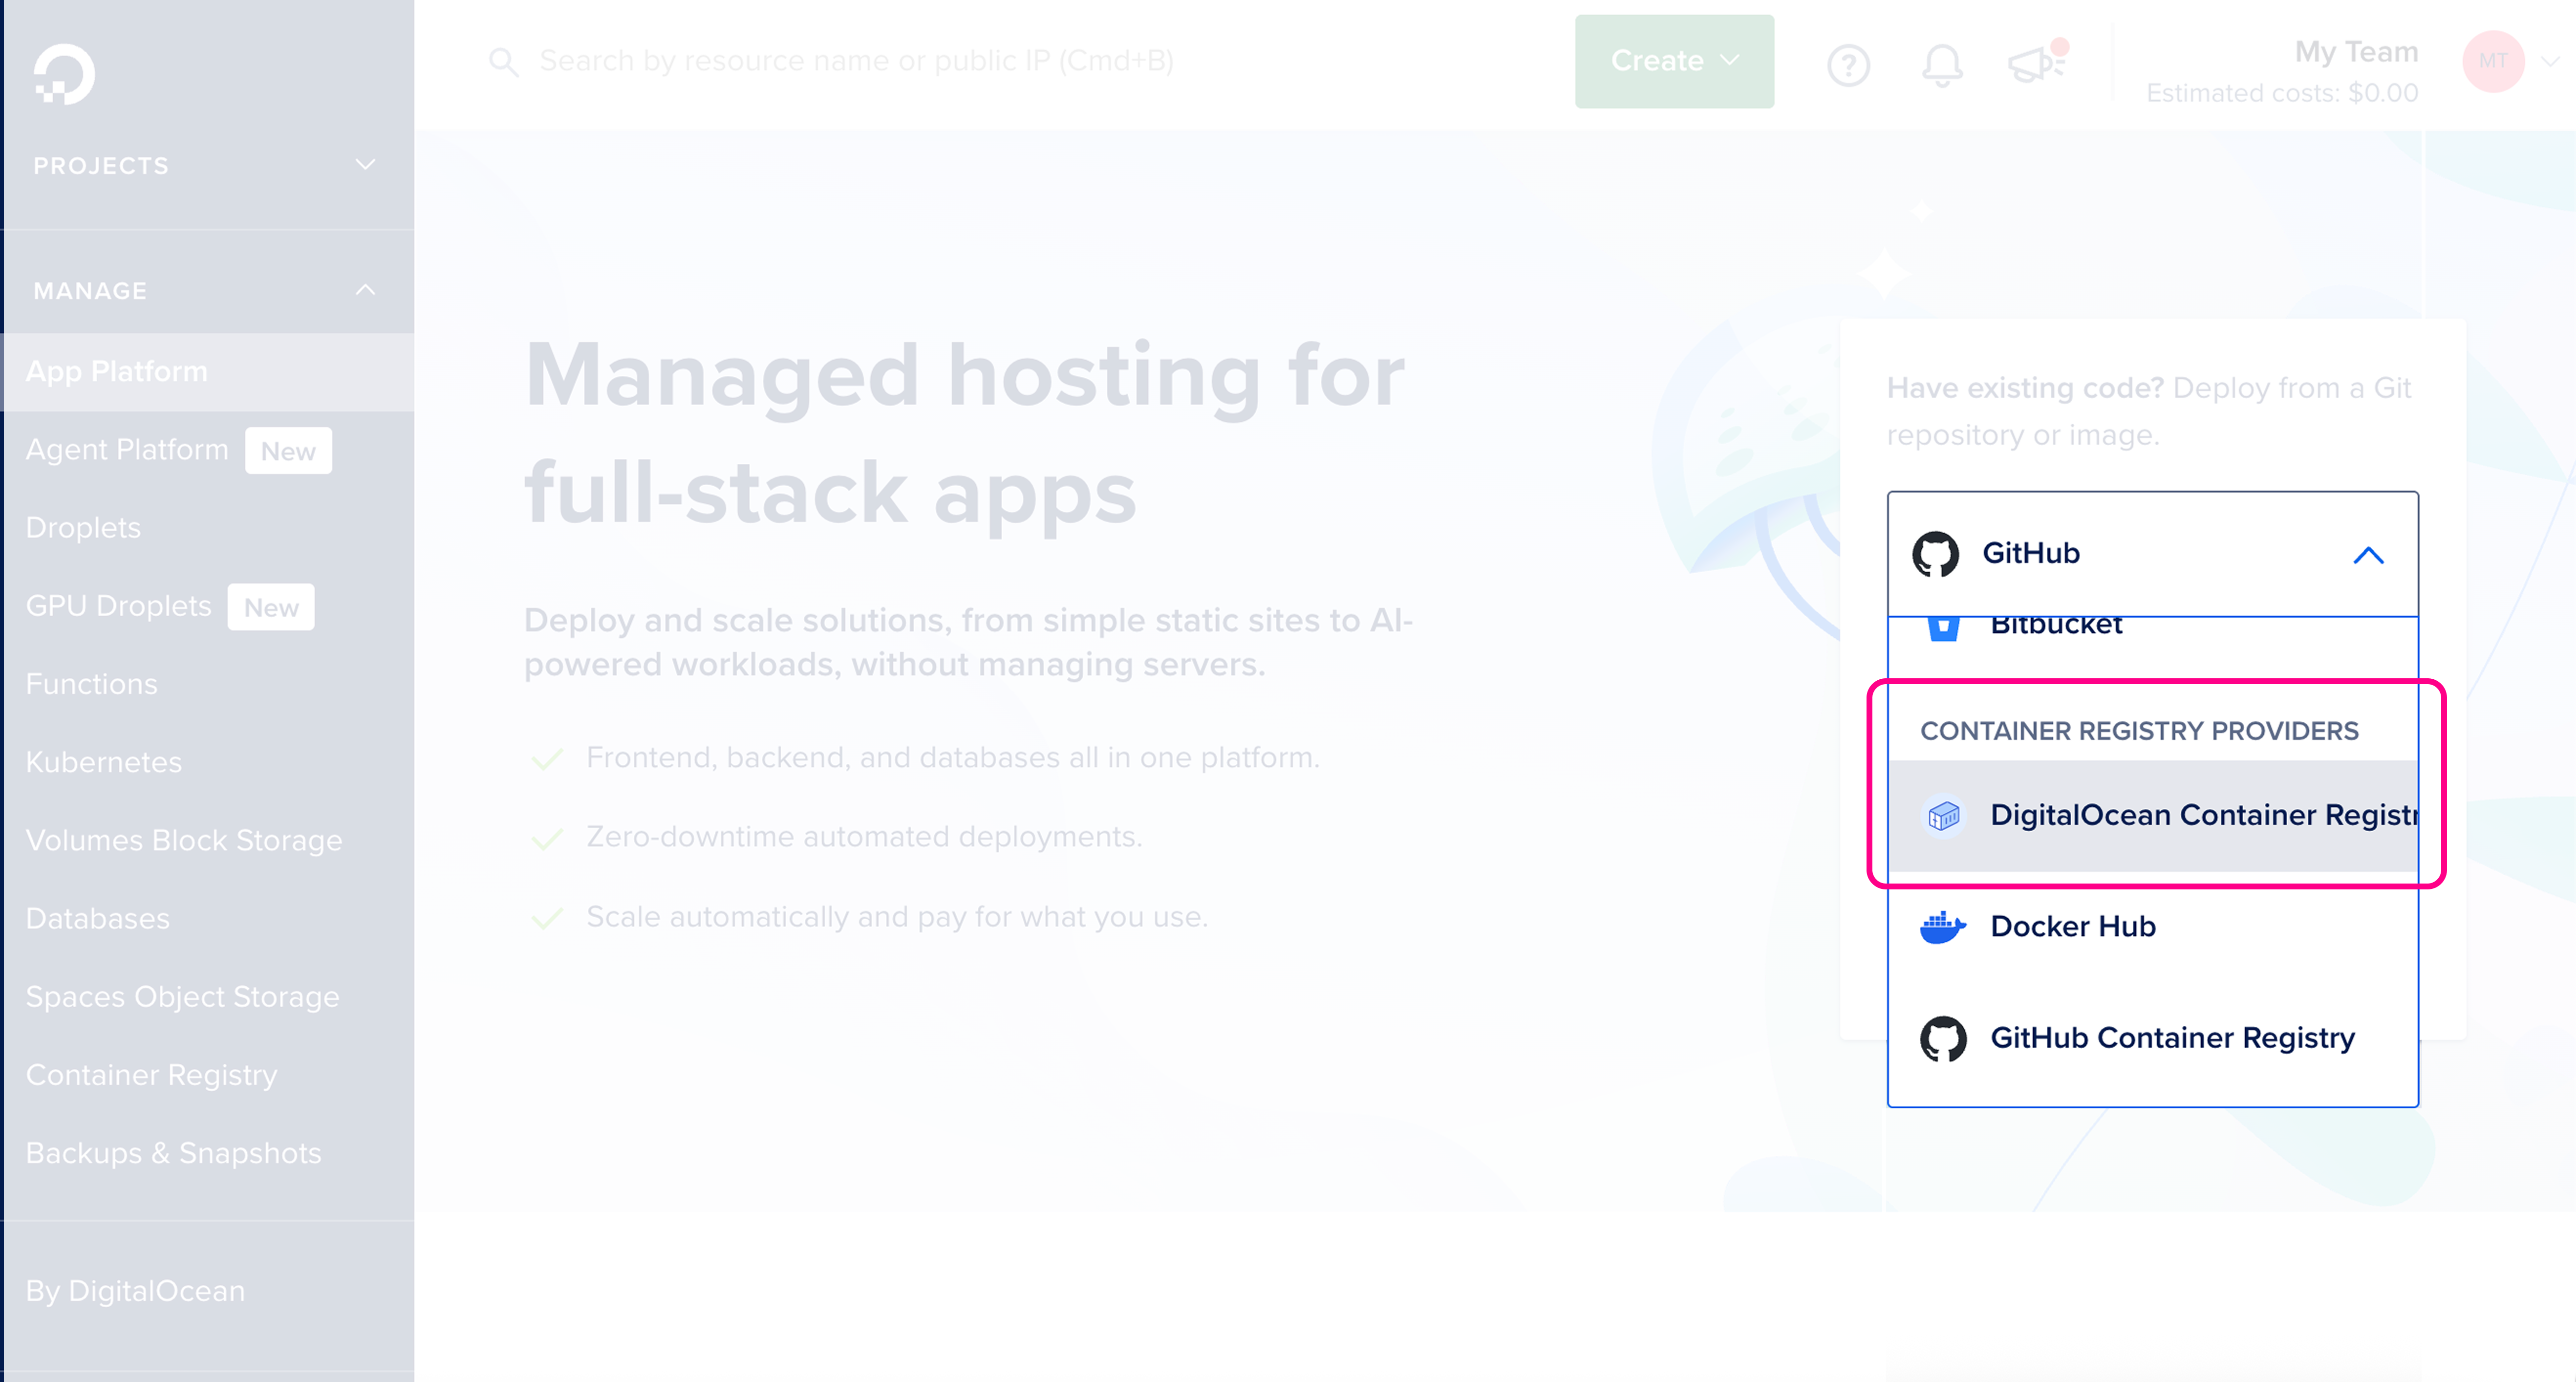 确保详细信息正确,然后点击 **下一步**。
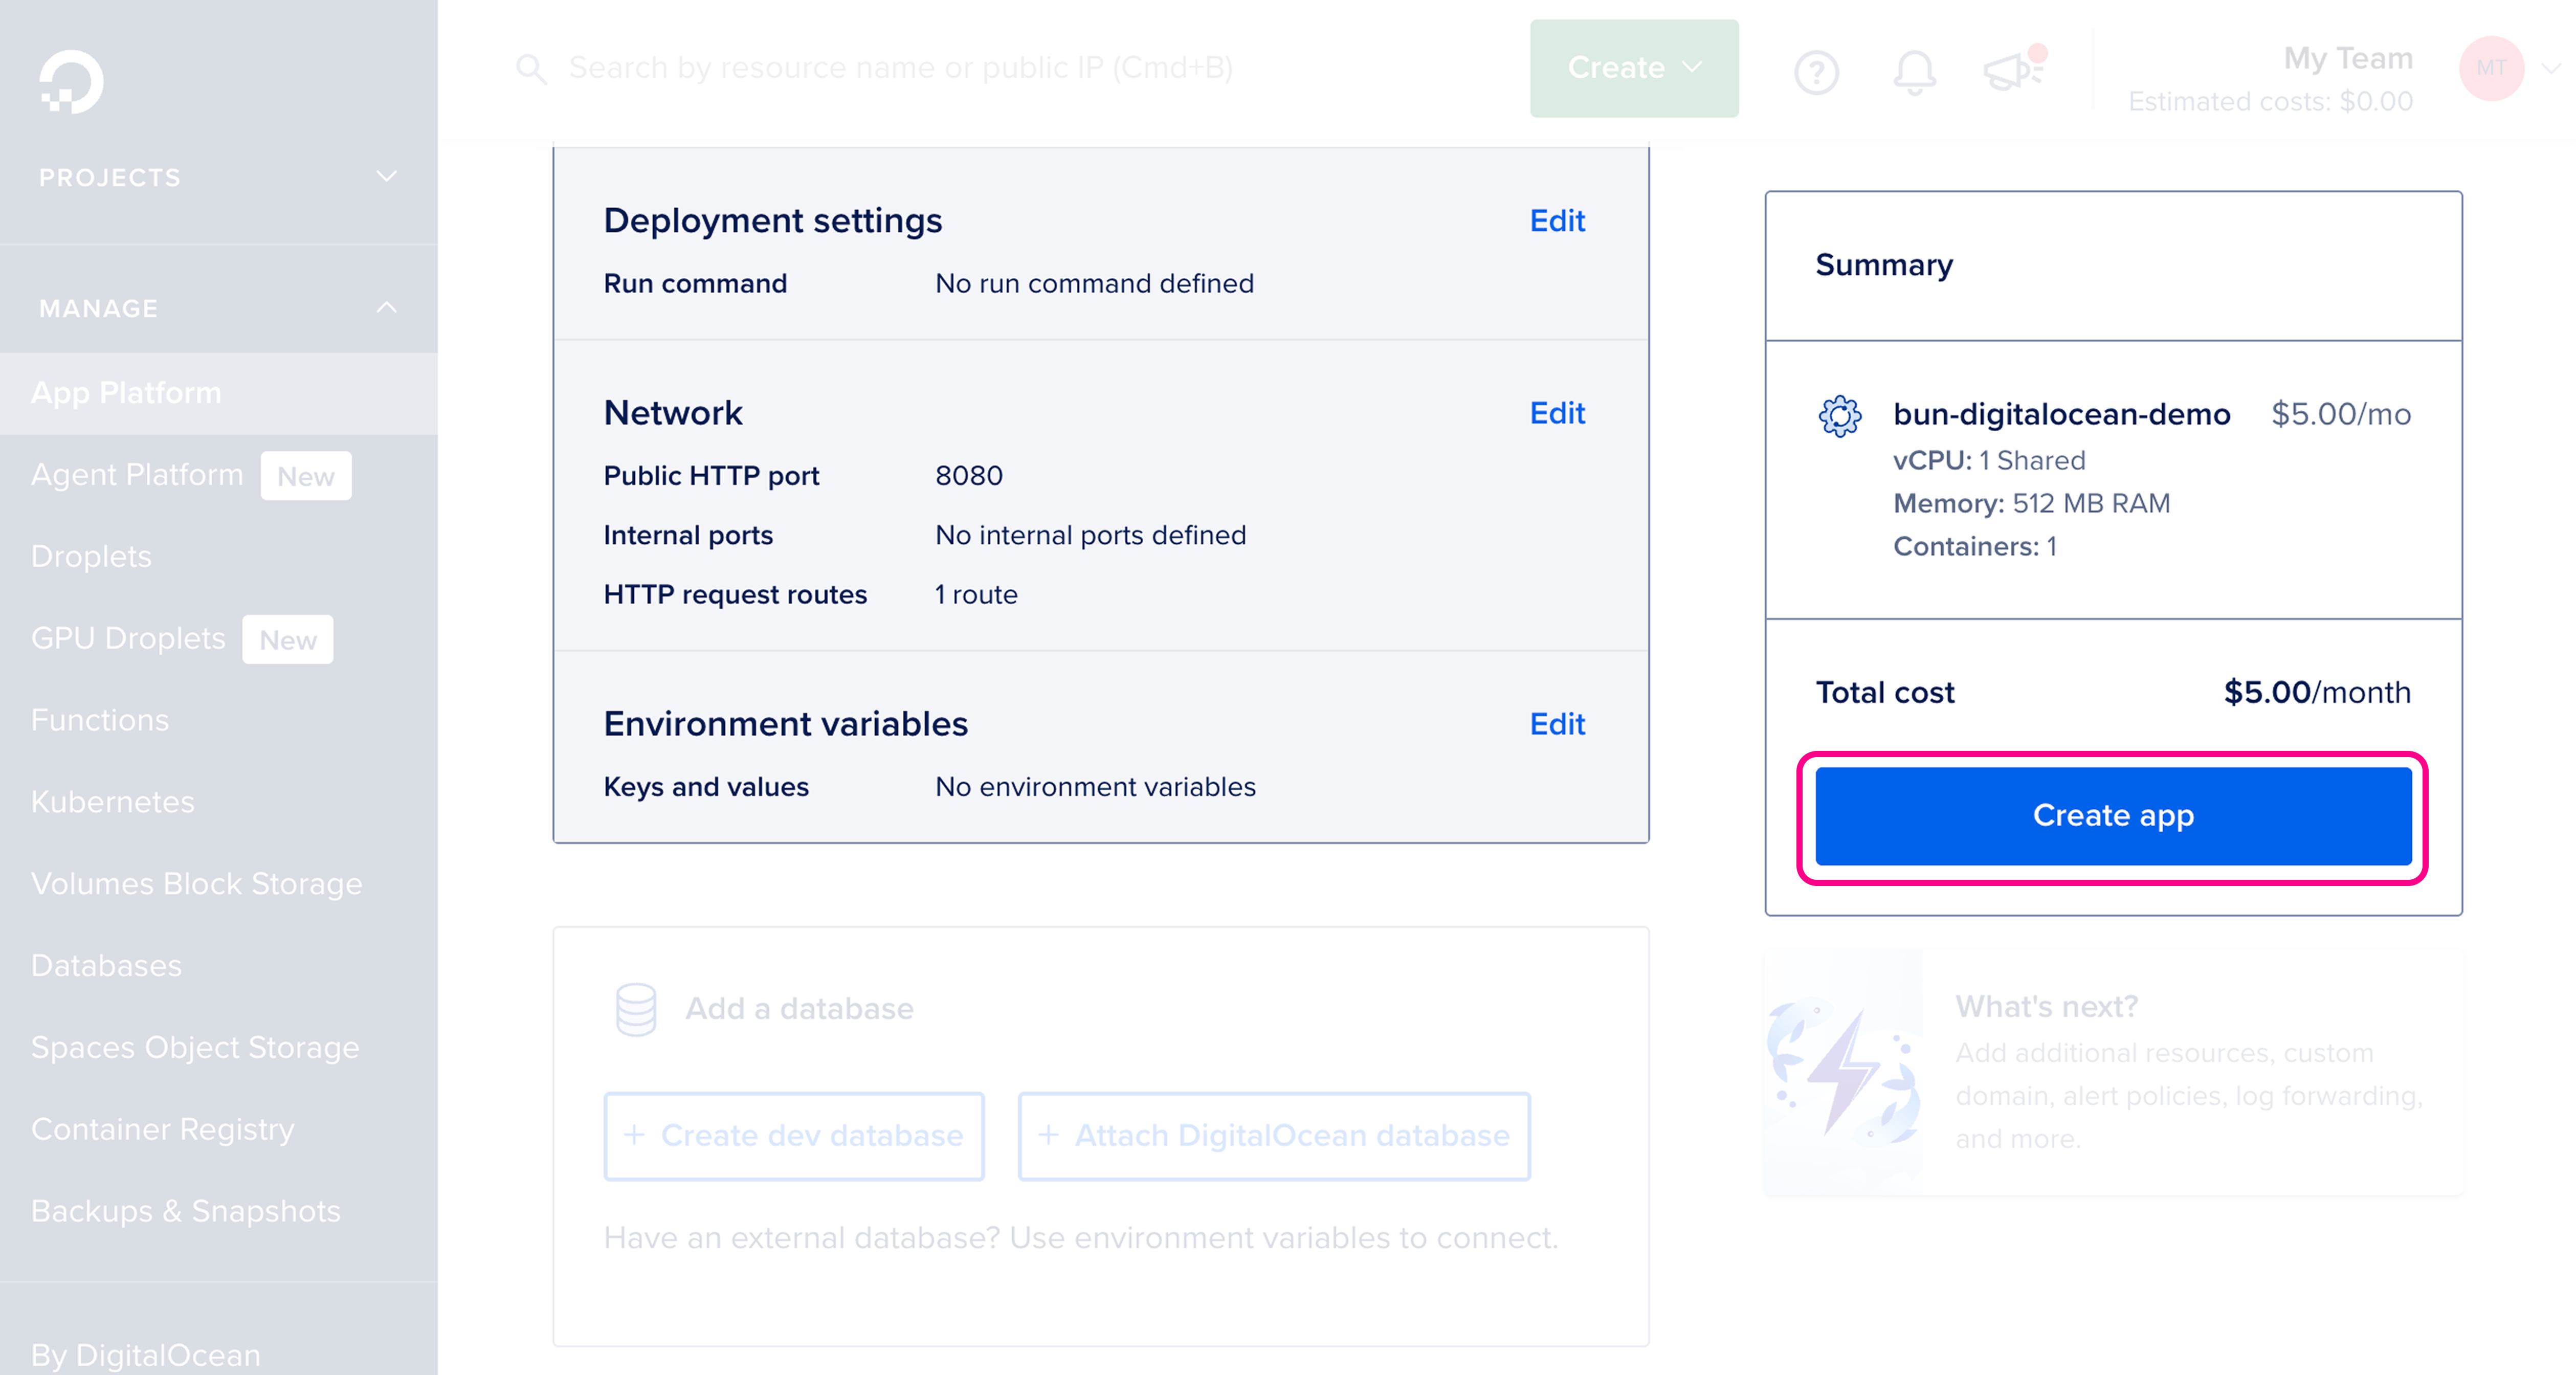
 查看并配置资源设置,然后点击 **创建应用**。
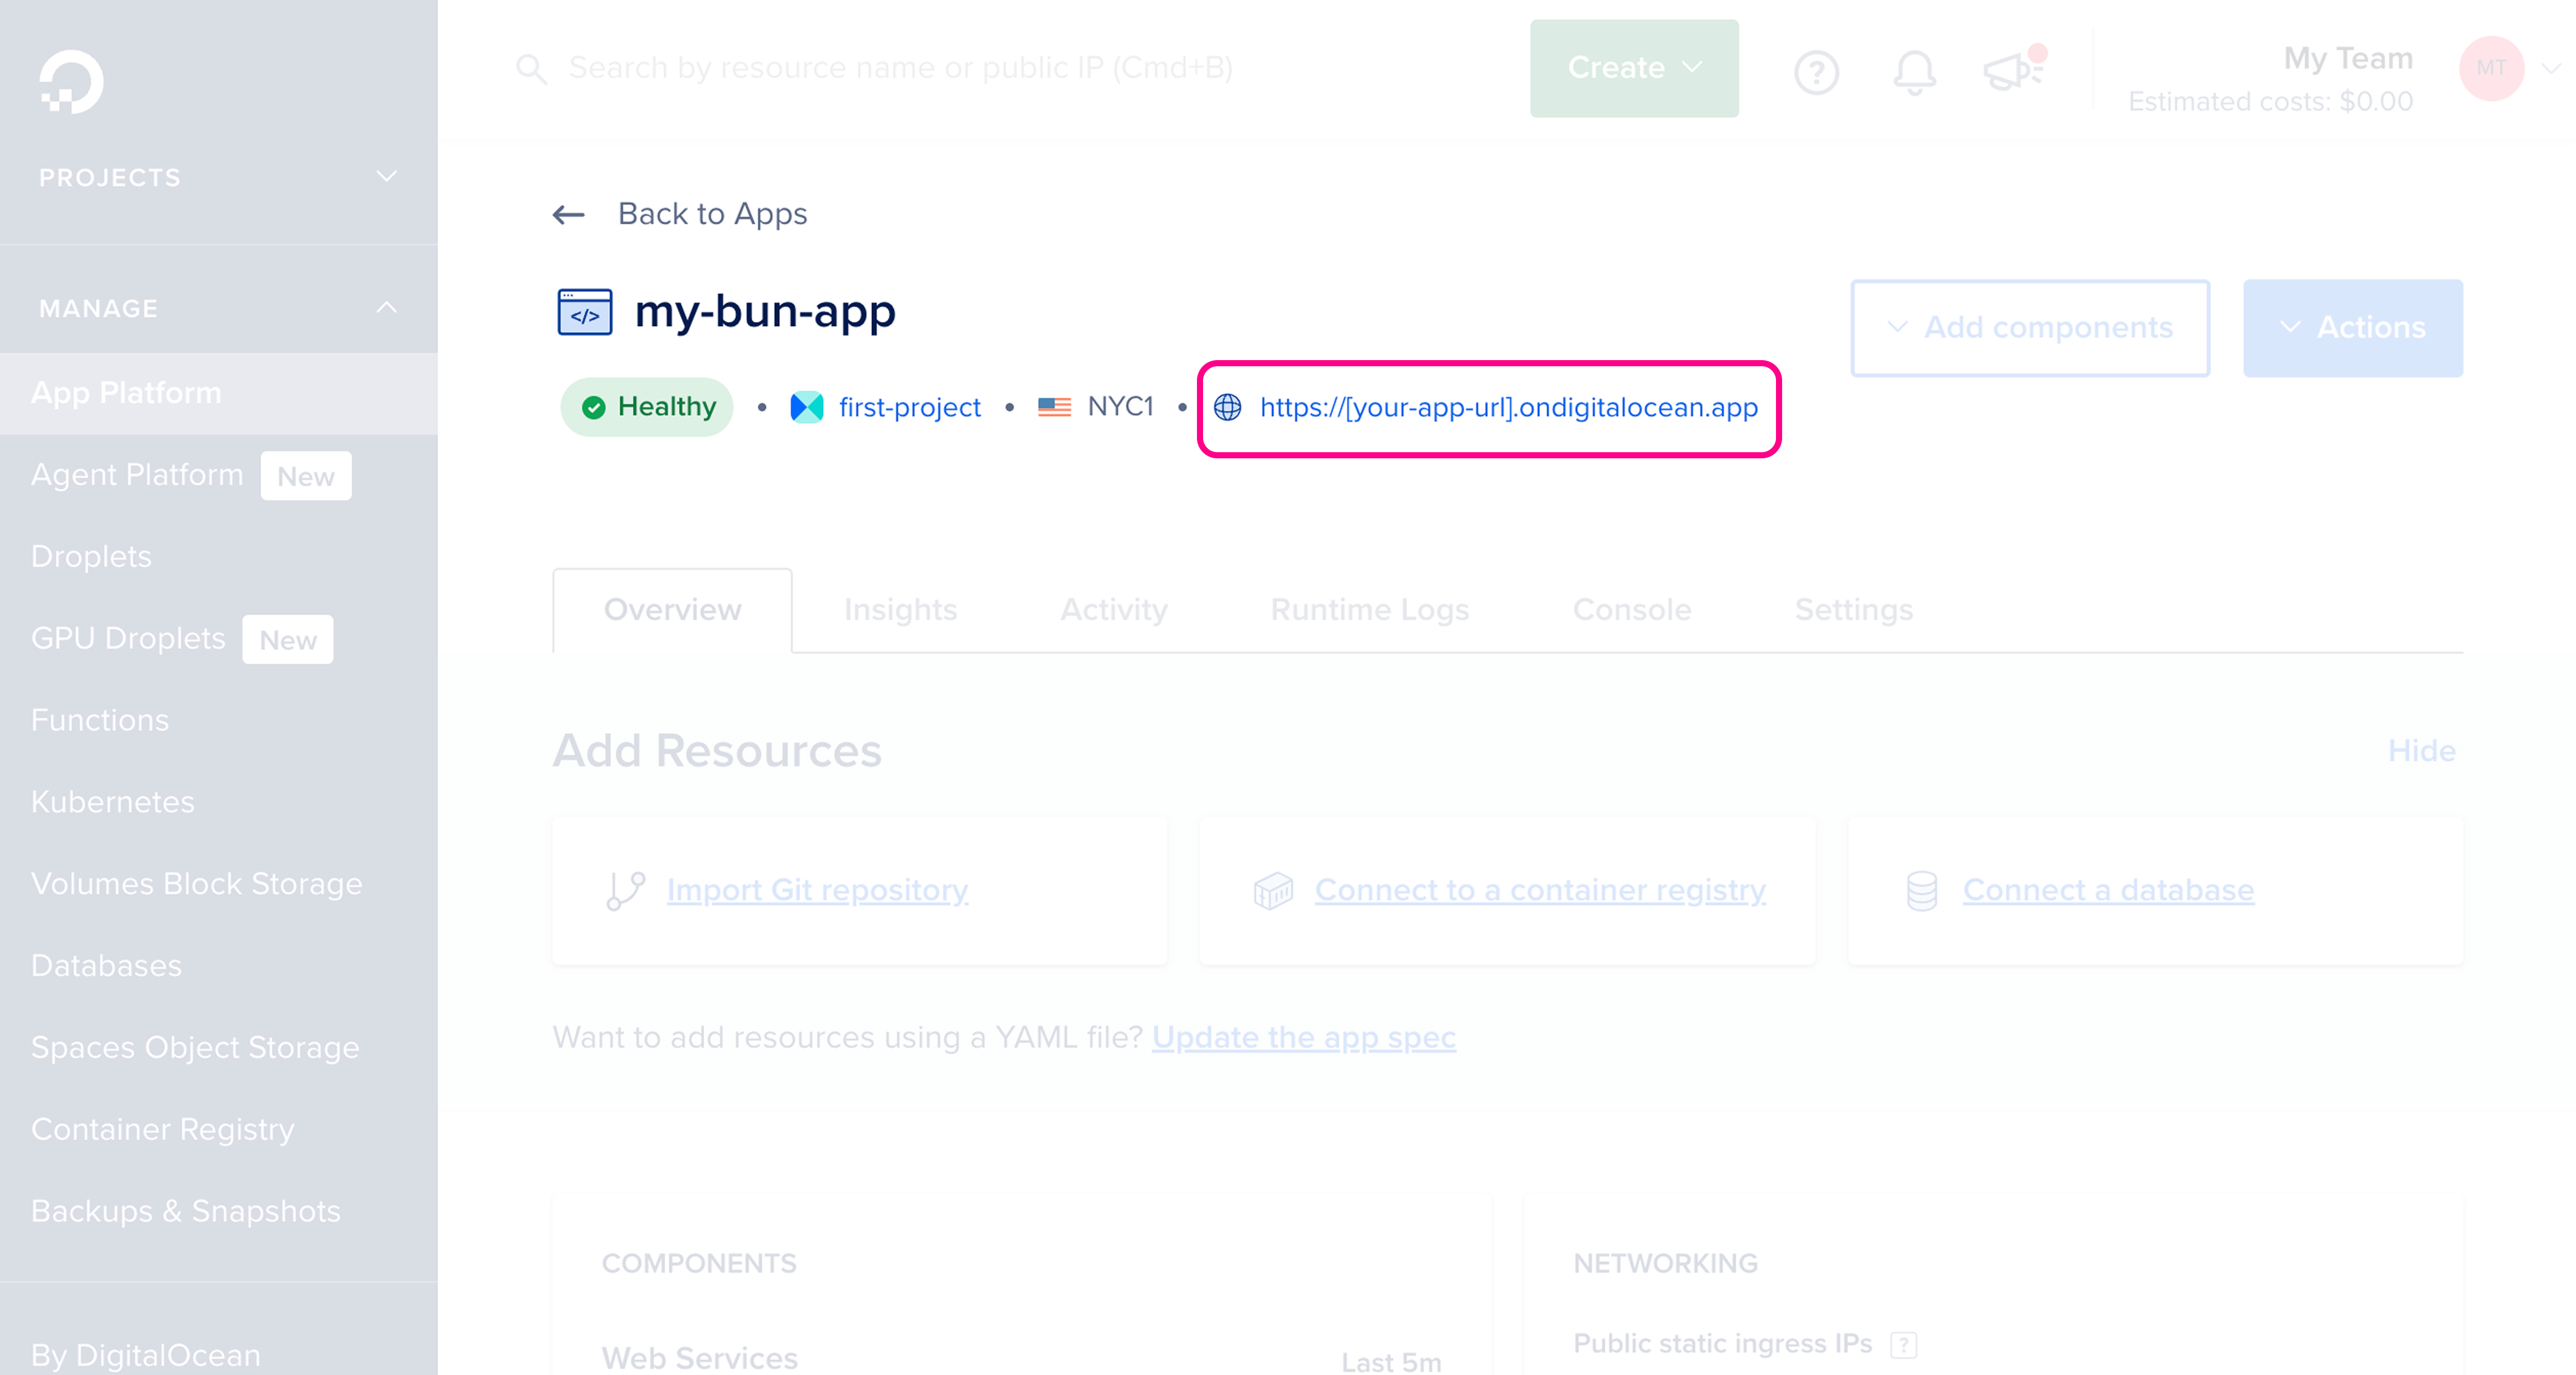
 你的应用现已上线。应用创建完成后,你应该可以在 App Platform 仪表盘中看到它及其公共 URL。